How to start
How to start making your own mobile app
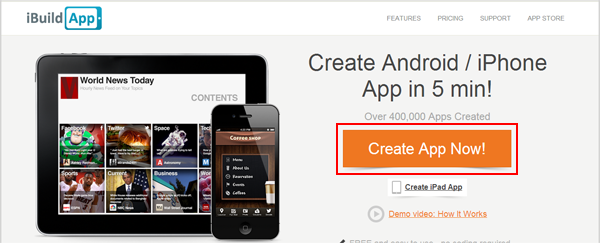
Open ibuildapp.com in your browser and click "Create App Now!" button.
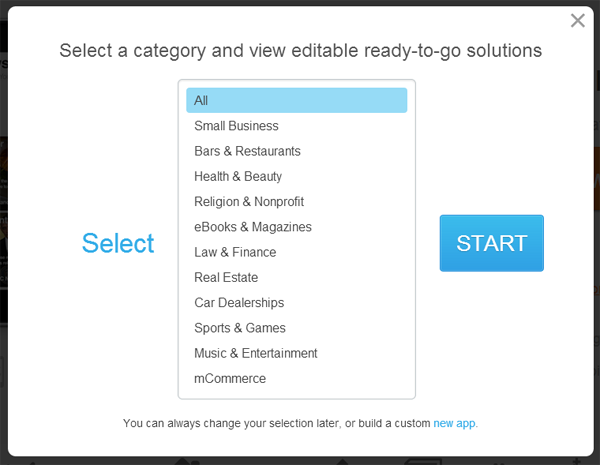
To start making your own mobile app choose a category that best fits your business:
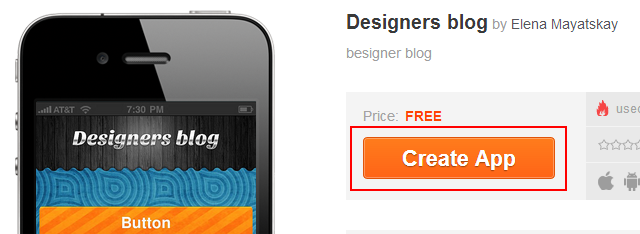
You will be taken to the marketplace where you can choose ready-to-go solution (or design template) you like. Select a solution ( template) you like and click on the "Create App" button. Most templates are free, but there are also paid ones. If you choose a paid template or solution, it will first display a payment page.
If you’re not logged in, it will ask you to login or register.
When done, you'll be redirected to the Application Management Panel, where you can customize your App (F.A.Q. How can I customize my app look and feel?) and manage your content (F.A.Q. How can I manage my content?)
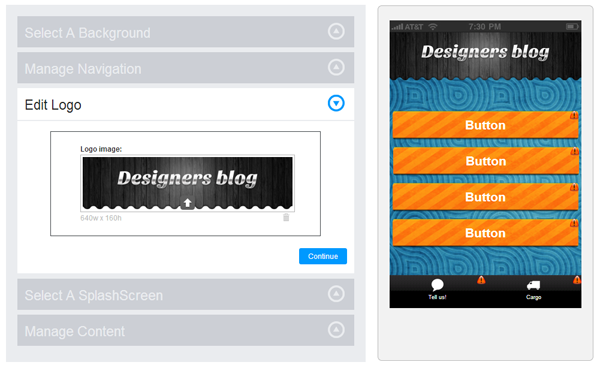
Just follow all the steps from App Design page to get your App fully customized (you can edit background image, upload your logo, manage navigation buttons and tabs, upload your own splash screen).
Use Phone simulator to navigate through the App: click on tabs or buttons to see appropriate page. The edit section will get updated accordingly, so you can manage it’s content.
Once you're done with App’s content and interface, click "Save and Complete" button - the system validates your App content; once validated, it will take you to the Publishing page. If some pages are incomplete, the system asks you to fix it.
App look and feel customization
How to work on your App look and feel customization.
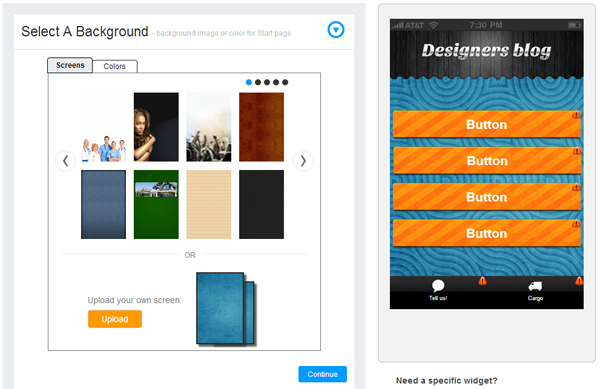
Once on the App's Design page, you’ll see all UI components broken down by sections and available for customizing on the edit area. Those UI elements depend on selected template:
Step 1. Start designing the Home page - edit your background image. You can choose a solid color.

a pre-designed background image, or upload your own background image:
Either upload separate backgrounds for iPhone4 & iPhone5, or crop iPhone5 image to fit iPhone 4 dimensions:
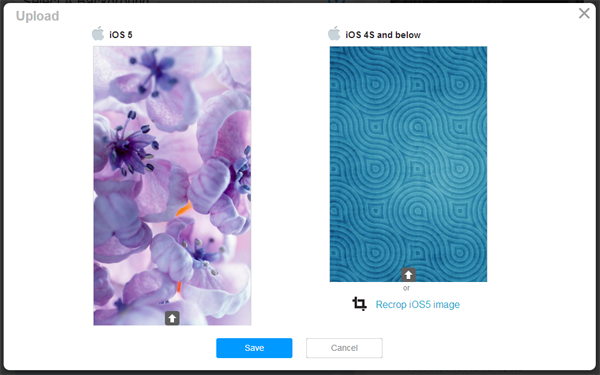
Note: The image dimension must be 1136 x 640 in pixels; otherwise it will be scaled and cropped to fit the size. File must be under 5MB.
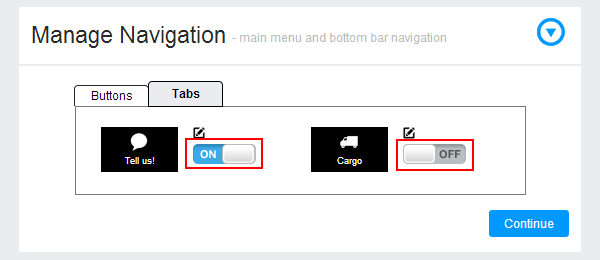
Step 2. Manage navigation buttons - as they appear on your Home page. Each control has default title and image.
You can change the title, choose a pre-designed image or upload custom image by clicking the pencil icon  next to the control:
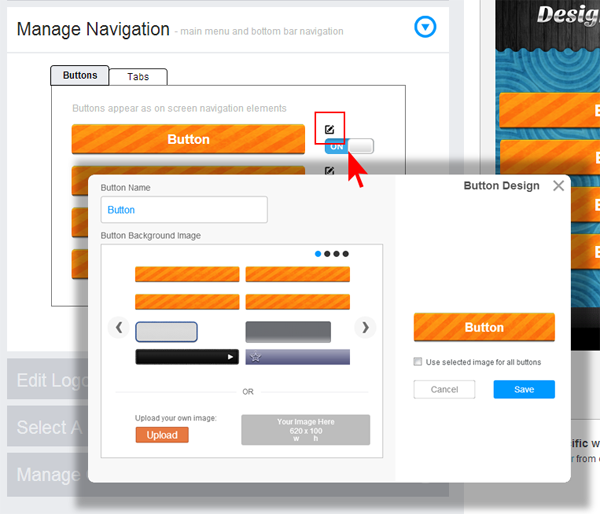
Note: Follow image dimension tip on the right of Upload button in order to get a better result; otherwise it will be scaled and cropped to fit the size. File must be under 1MB.
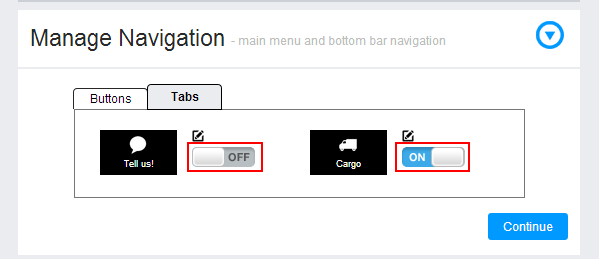
Step 3. Manage navigation tabs - as they appear on your Home page. Each control has default title and image. You can change the title and customize image by clicking the pencil icon next to the control:
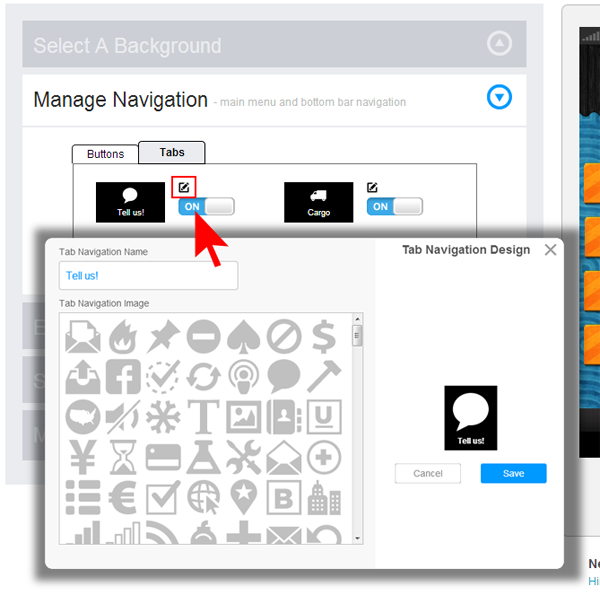
All changes will be immediately displayed on the iPhone simulator.
You can hide (remove) button or tab by using  control next to it.
Manage navigation: add/delete a page
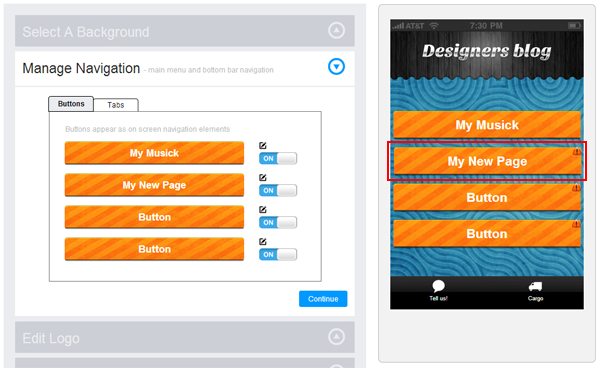
Each template has a certain number of pages. For example, the template from the image below, has 6 pages. So if you want to add an extra page, you have to create a template with different number of pages. See "How can I create my own template?" section.
Customizing pages
Step 1. Select a navigation control on the simulator (alternatively, you may select appropriate widget from the Manage Content section): upon clicking on the button/tab, it will update the Phone preview screen and editing section on the left:
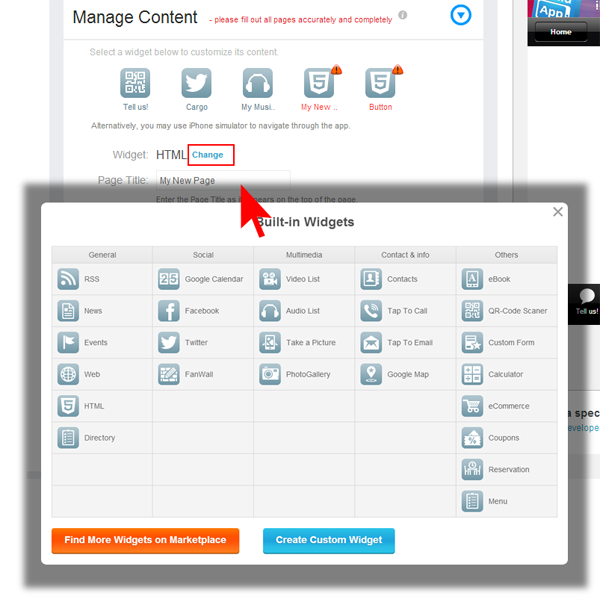
Step 2. Assign a function (widget) for your page using Change link - select from a bunch of pre-defined widgets or find a widget on our Marketplace:

Step 3. Fill out your content - follow on-screen instructions.
Removing a page
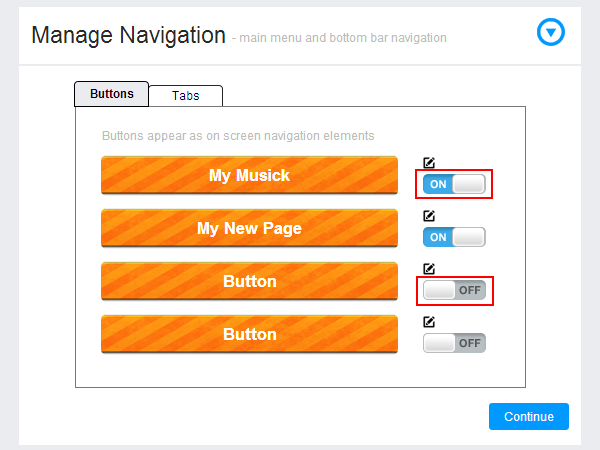
To remove a page from your app, open the Manage Navigation section and turn off the trigger on the right of the appropriate navigation control. The page will be hidden (however, all content will remain). If you later decide to use this page again, simply turn the trigger on.
Manage content
Use Phone simulator to navigate through your app. When clicking on a navigation control (button or bottom tab) from your Home page, it will redirect to a page associated with the navigation control. The left section will get updated accordingly, so you can edit the page content.
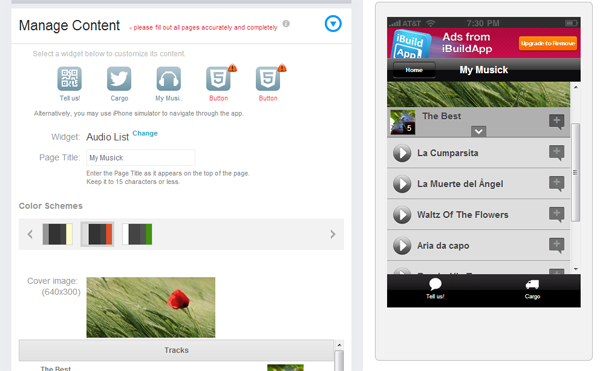
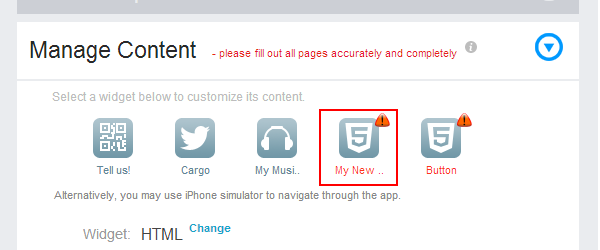
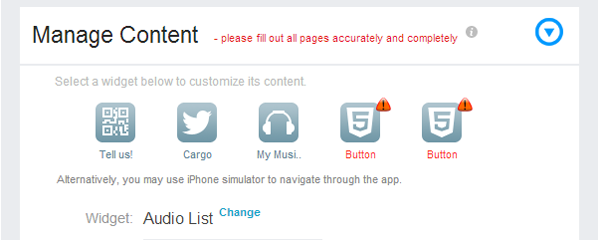
Use widget icons on the Manage Content section. Incomplete pages are marked with  icons.
You can make changes to your app's content at anytime - all changes are immediately getting available on mobile devices - no resubmission required.
The editing section depends on the widget associated with the page.
What is widget?
Widgets, in fact, define core functionality of your app. iBuildApp provides about 30 different widgets (see Features page: https://ibuildapp.com/features/).
Each widget is customizable in terms of design and content. I.e for Calculator widget you setup variables, constants, values, formula and color scheme.
To manage widgets within your app, open up the Manage Content section and use "Change" link:
How to change a widget
To change a widget, log into your application management panel and navigate to desired page using Phone simulator. Click on the ‘Change’ link and select desired widget from Built-in Widgets popup:
When changing a widget, the system will warn you: "if you change the functionality for this page, all the content you've entered before will disappear". Click "Continue" to change the widget, or "Cancel" to keep existing content.
How to create custom app template
How to create custom app template. Creating a template is an easy way to produce several apps that have similar features. If you need several menus, several home pages or want to reuse the same background image for a handful of applications, a template is the way to go. It saves images, text and button placement – saving time and headaches.
Creating a re-useable template in iBuildApp is a straight forward process.
Begin by logging into iBuildApp, or creating an account if you haven’t done so yet.
On the top right, beside your log in name, click on the arrow and select "My Templates"

This opens up the templates page. Since this is your first one, it is mostly blank. Click on the "Create Template" button on the right hand side.
You now see a preview smartphone screen. You can begin dragging and dropping UI elements from the menu on the left hand side. Keep in mind that you can change images and text within the template when building your apps, but you cannot change the positioning of elements. Ensure that your template is built for all your apps’ needs.
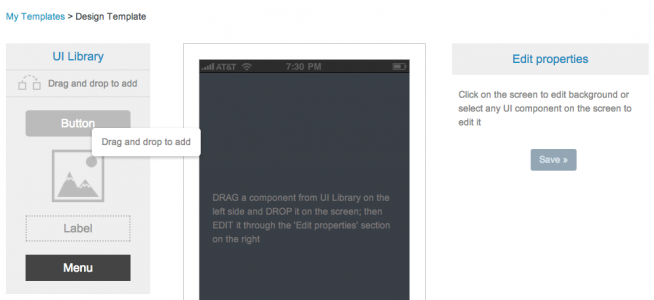
There are several elements to choose from:
- Buttons
- Images
- Labels
- Menus
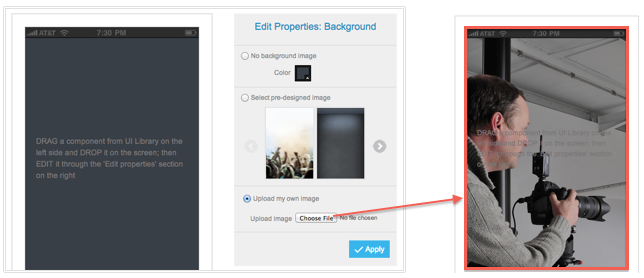
We will begin by making a sample template. Click on the preview smartphone screen to add a background image. You can use the properties on the right side of the screen to change your background image’s settings. When you are done moving or resizing the image, click the apply button to save your changes.
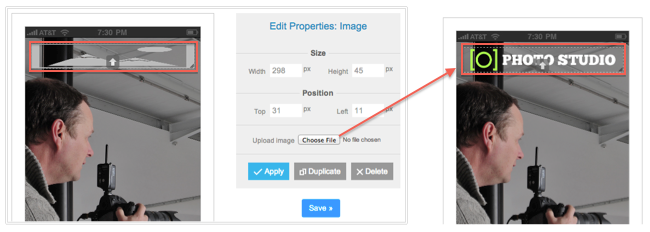
You may try the photo element next. Drag and drop the photo element from the left menu onto the preview smartphone screen. This is very similar to the background image you had just added, however your new image only covers a portion of the screen. You can use this to add a logo for your applications or decoration to the screen. Click "Apply" to save your image.
Drag and drop the button element from the menu to the preview screen. Again, you can adjust the text, size and position using the properties field on the right. When you are finished, be sure to press the apply button, otherwise your settings will revert to what was displayed previously.
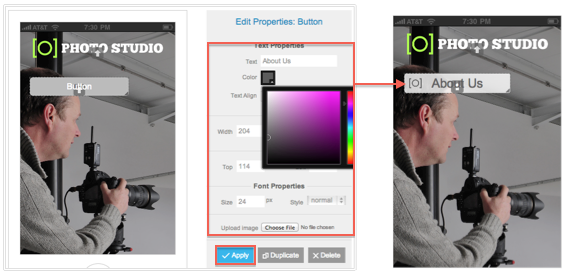
You can duplicate as many buttons as you need or drag and drop each of them from the left menu.
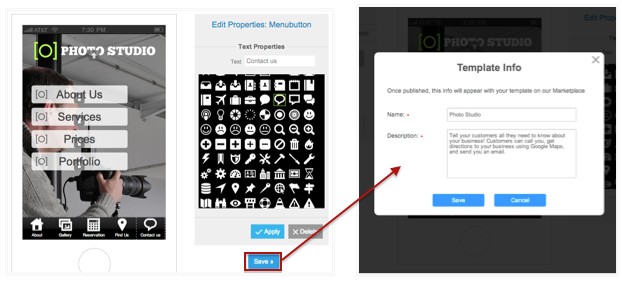
Finally, adding a menu item adds up to 5 buttons across the bottom of the screen. You can pick from a number of clip art icons and change the text for each menu item.
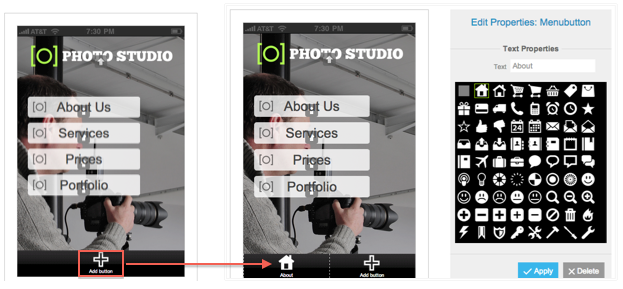
When you are done press "Save" on the bottom right of your screen. Fill in the requested information and press save again.
After saving your template, you can begin creating the first app using it right away by pressing the create app button. If you built the template to share with the iBuildApp community, you can chose to publish the template on the marketplace by pressing the appropriate button.
Your template is ready! You can use the time you just saved to post more tips and tricks on template building in the comment section.