Photo Gallery
If you would like to share your photos, images, pictures, any other graphic info with your users just use our Photo Gallery in Android and iPhone mobile apps.
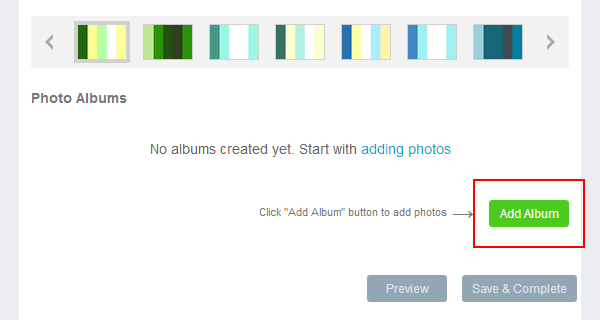
Photo Gallery in Android and iPhone mobile apps: To start adding images click "Add albums" button:
There are 4 ways to provide your users with the images:
Flickr
Choose "Flickr" icon in the pupop and enter your Flickr Username, tap "Enter" button on your keyboard, then choose the albom you would like to embed to your app:
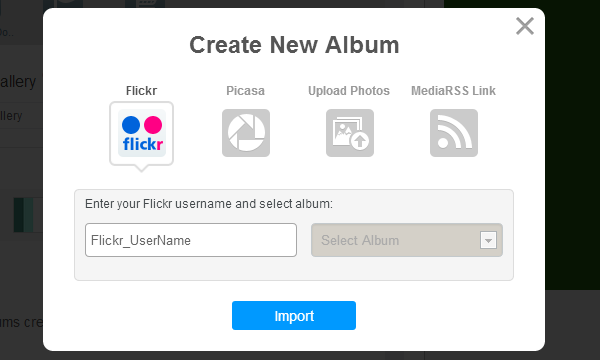
NOTE: your albumn should be public.
Picasa
Choose "Picasa" icon in the pupop and enter your Picasa Username, tap "Enter" button on your keyboard, then choose the albom you would like to embed to your app:
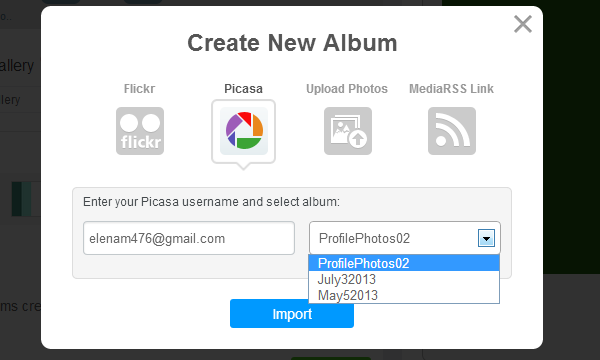
NOTE: your albumn should be public.
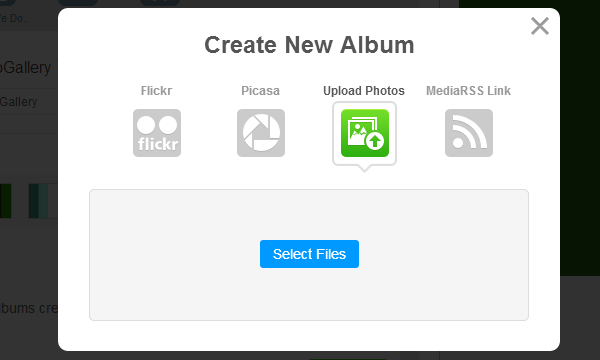
Upload Photos
If you would like to upload photos from your computer. Click "Select files" and choose all the photos you would like to see in your app.
MediaRSS Link
If you’ve got Media RSS link, then you can also use to provide your users with your images. Click the "Media RSS" icon and enter you URL:
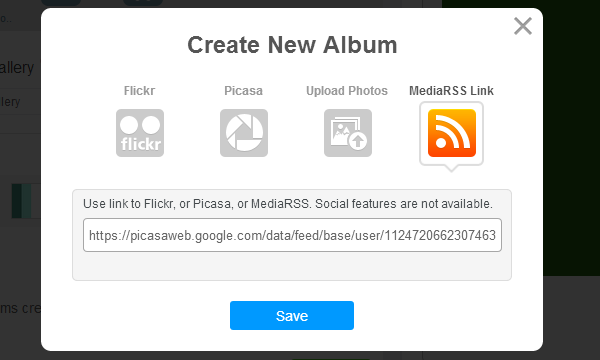
As soon as you are done click "Save" button. All the photoes will be added to an album, that will created automatically.
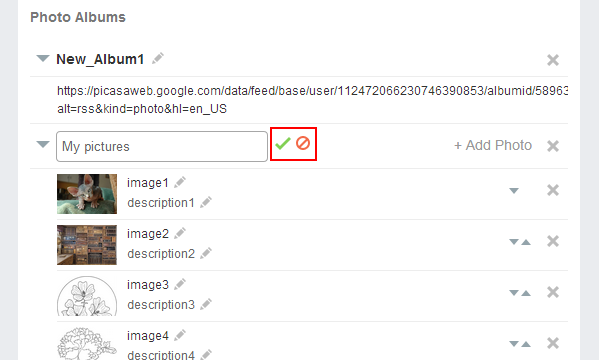
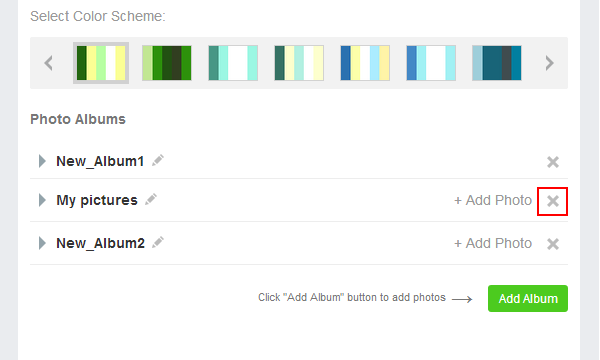
If you would like to edit your album name click on the pencil (
Edit) icon to edit the album name:
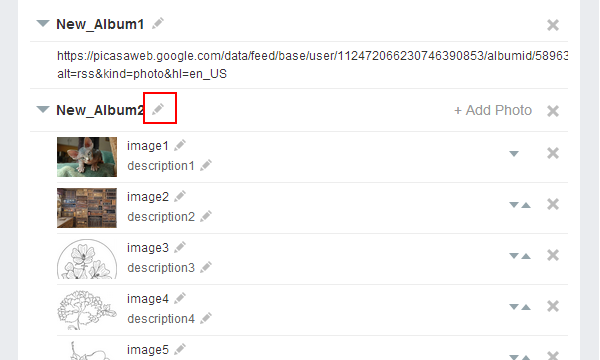
Edit your album name and click to save changes, or click to cancel.
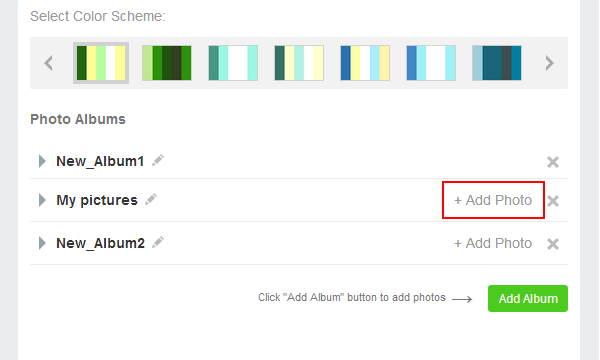
To add a photo to your album click "+Add Photo". You can add a phpto from your computer only:
To delete an album click the control on the right:
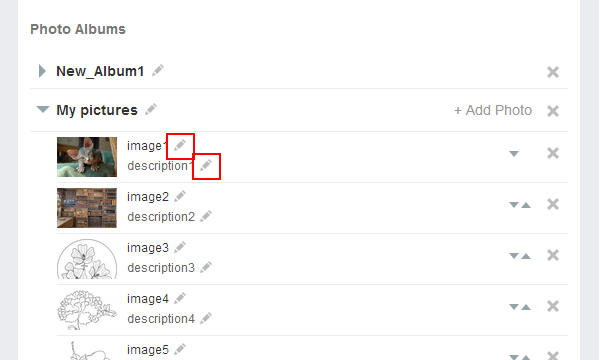
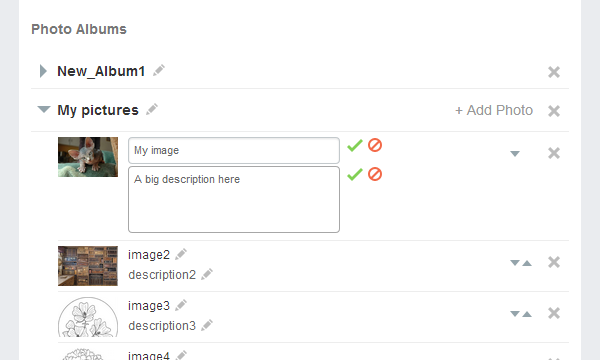
If you would like to edit your picture or picture description name click on the pencil (Edit) icon to edit:
Edit the fields and click to save changes, or click to cancel.
That’s it! smoth Photo Gallery in Android and iPhone mobile apps is ready.
Events
If you’ve got events that you need to announce via your app, then use the Events widget in your app.
To insert the Events widget in your app choose it in the change widget type popup.
You can use an RSS Feed to deliver your events. Click the "RSS Feed" icon and enter your URL as shown below:
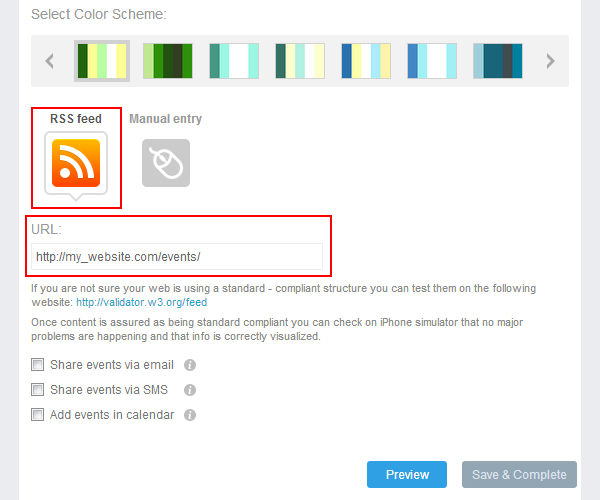
You can also enter your events manually. Click the "Manual entry" icon and start adding your events by clicking "Add" button:
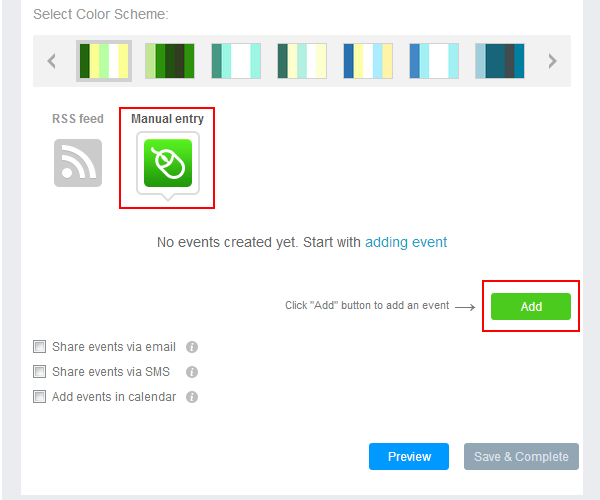
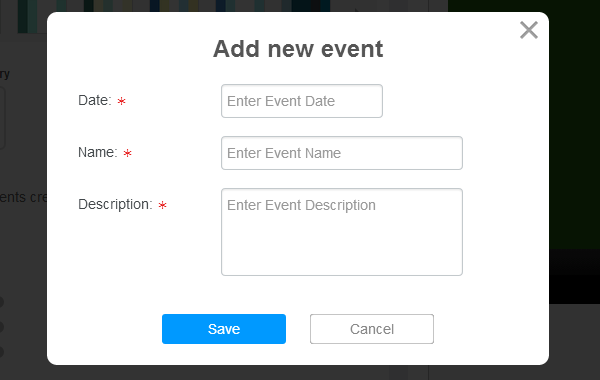
In the popup, enter the date, title, and description and click "Save" button.
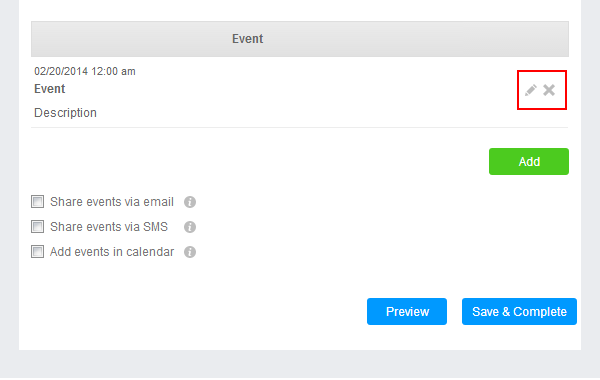
Here you go! Now all your users will get information on your events.
If you would like to edit or remove an event, select the "Edit" or "Remove" button on the right of each entry in the list:
Coupons
You can join the mobile marketing trend by offering mobile coupons to your customers!
NOTE: when adding coupons to your existing app, you don't have to resubmit it on the app store : the update will go live immediately - just relaunch the app on your device.
With Coupons feature, any business can make and distribute mobile coupons and give their customers special discounts.
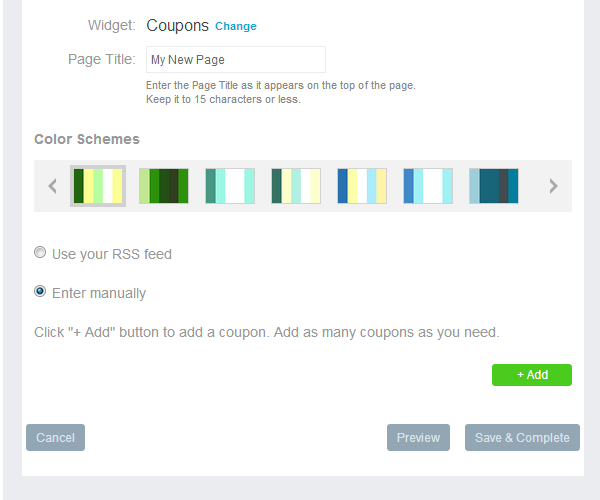
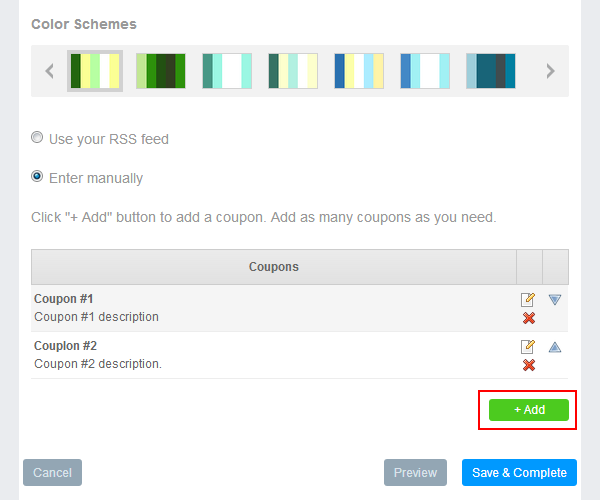
On the page editing section, select "Coupons" page type in the popup. This function supports both RSS feeds and manual entry (‘use your RSS feed’ and ‘Enter manually’ radio buttons):
If you choose using your RSS feed, enter valid RSS link that describes coupons. The system will prompt you if the feed is invalid.
If you choose to enter your coupons manually, click on the "Add" button to add a new coupon:
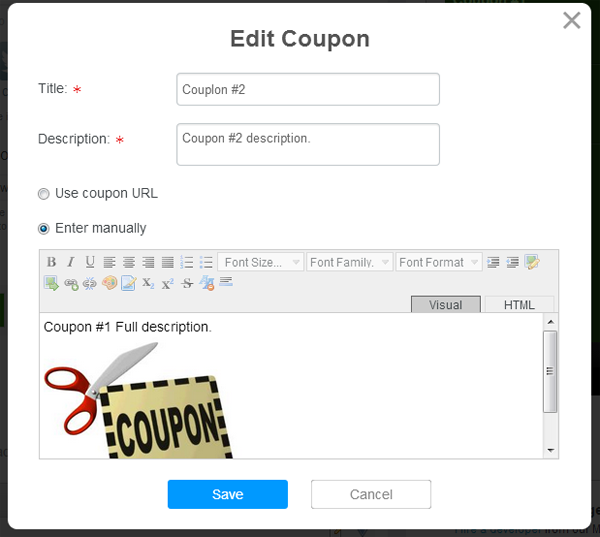
Enter all required info about your coupon – name and brief description (max 70 symbols). You may enter URL with a coupon link or use WYSIWYG editor to enter it manually:
Once you're done with your coupons, your customers can enjoy their discounts.
Book Store
If you’ve got content you would like to sell via your app, you can use our BookStore widget for that purpose. To insert the BookStore widget into your app, choose it in the change widget type popup.
Filters can help your enduser to find what they are interested in.
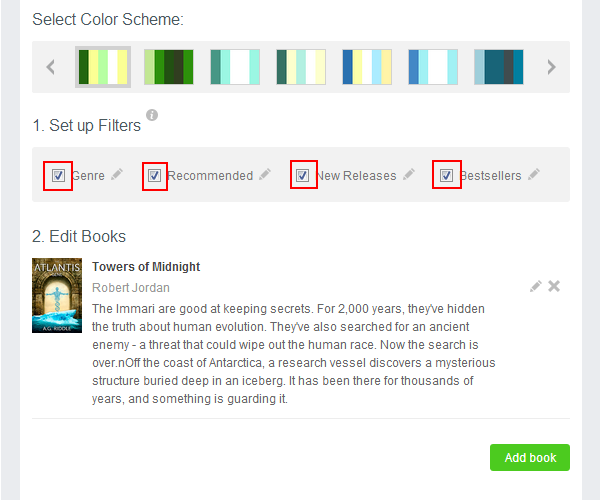
To switch on any of the filters check the box on the left:
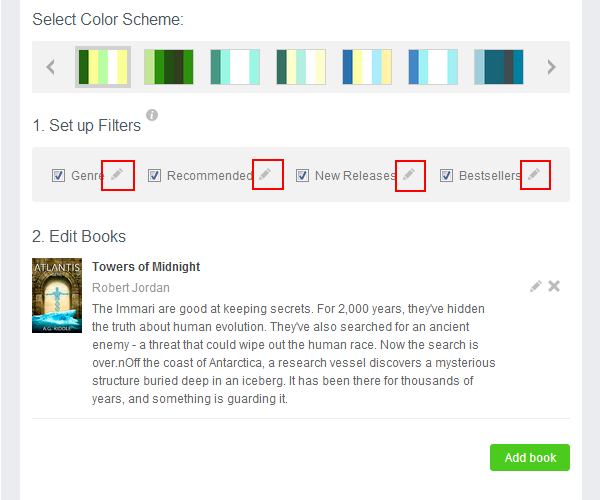
To edit filter names & items click the "Edit" icon on the left:
In the popup window insert desired name and edit entries by clicking the "Edit" icon on the right. Note that you can add or delete any number of filter items. When finished click "Update" button.

To add items click "Add Book" at the bottom of your list:
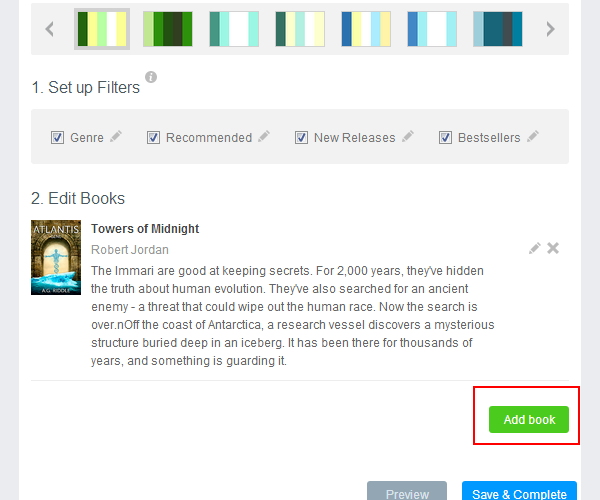
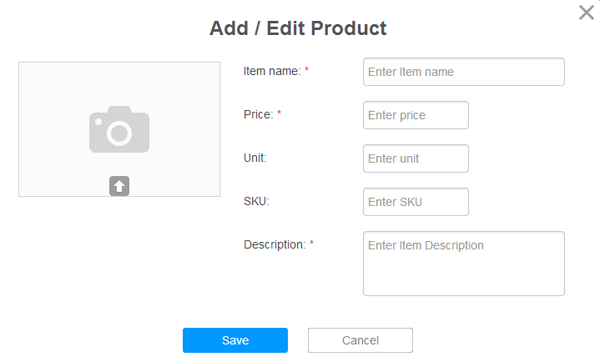
In the "Add / Edit Book" popup, complete the information for the item that you would like to list. Required fields are noted with an "*".
Note that "Genre", "Recommended", "New Releases", "Bestsellers" are filters, and we recommend setting those in order to help your users to perform a success search.
You can use an URL in "URL" field: that coud be your web store page, datailed description or a link to the content itself.

RSS
RSS (Rich Site Summary) is a format for delivering regularly changing web content. Many news-related sites, weblogs and other online publishers syndicate their content as an RSS feed in mobile app to whoever wants it.
Supported RSS feed in mobile app types:
- RSS Atom
- RSS 2.0
- Media RSS
Before using your RSS feed in mobile app we recommend that you validate it. Refer here:
https://validator.w3.org/feed/
enter your RSS feed URL and click "Check".
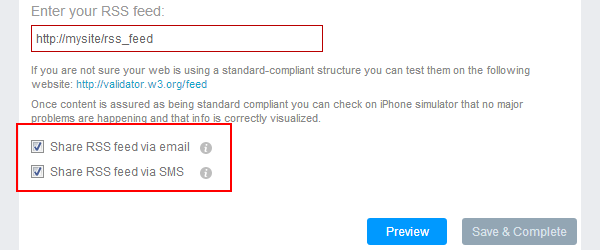
To use RSS in your app choose our RSS widget in the change widget type popup. Then enter your RSS Feed URL as shown below:
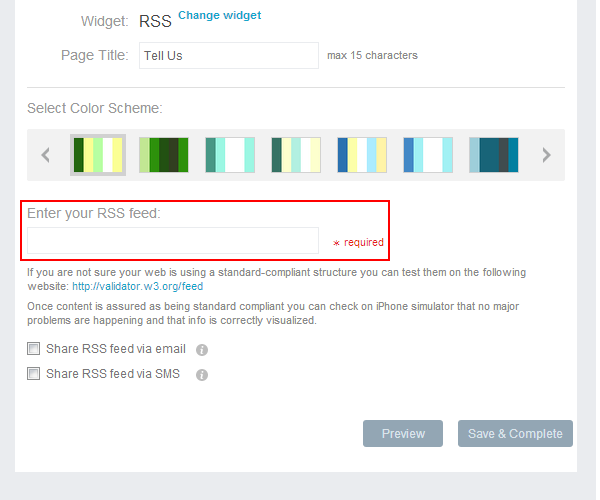
You can share your RSS feed in mobile app feed with users via email or SMS by checking either of the boxes if needed:
News
If you’ve got news that you need to deliver via your app, then use news feed in your mobile app.
To insert news feed in your mobile app choose it in the change widget type popup.
You can use RSS Feed to deliver your news. Click "RSS Feed" icon and enter your URL as shown below:
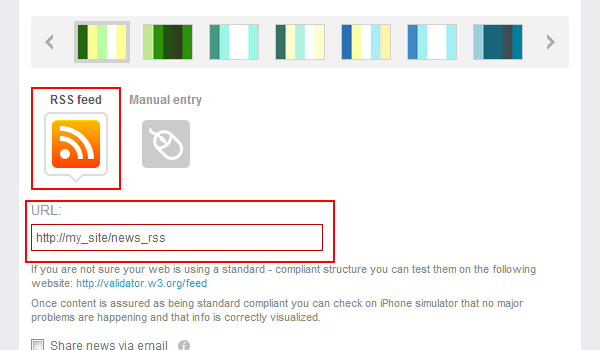
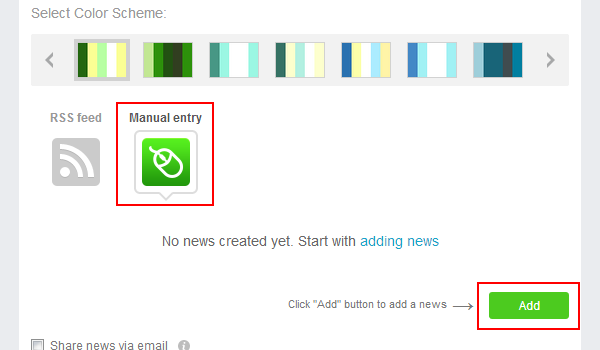
You can enter your news manually. Click "Manual entry" icon and start adding news by clicking "Add" button:
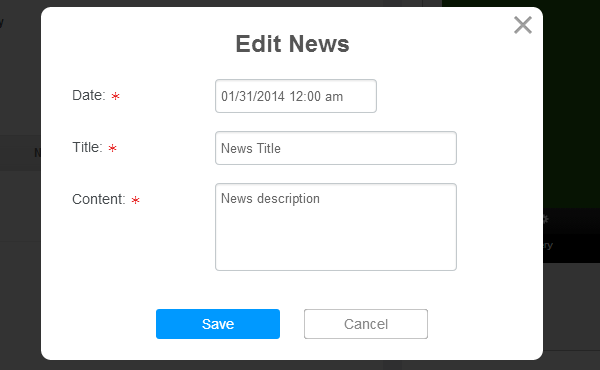
In the popup, enter the date, title, and description and click "Save" button.
Here you go! Now all your users can read news feed in your mobile app.
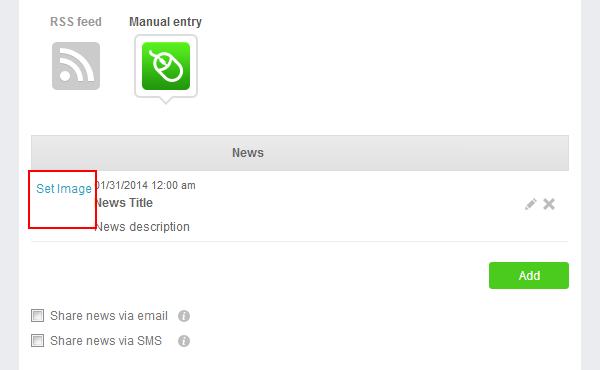
Select the "Upload image" link on the left of the news title to add an image:
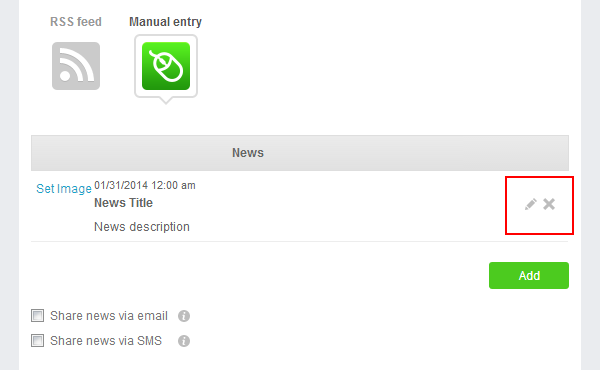
If you would like to edit or remove select the "Edit" or "Remove" button on the right of each news entry in the list:
Shopping Cart
If you would like to sell any goods via the app, our Mobile Shopping cart can help you in this. Your users can create orders and send those to the email you specify.
Insert Mobile Shopping Cart into your app by selecting it from change widget popup.
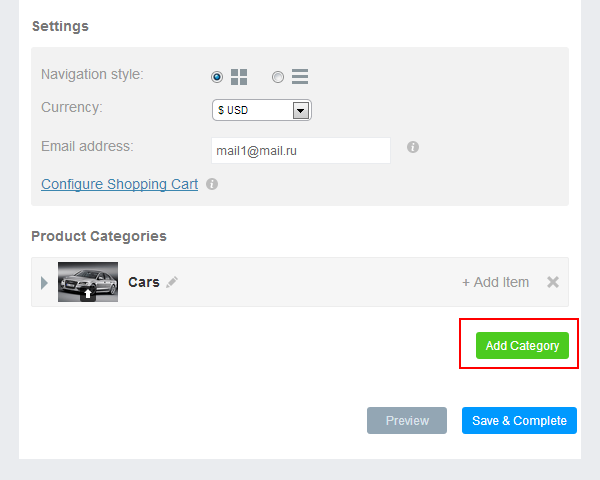
You need to set up your shopping cart first. Choose the currency, enter the email you’ll be getting email on and then click on the "Configure Mobile Shopping Cart" link:
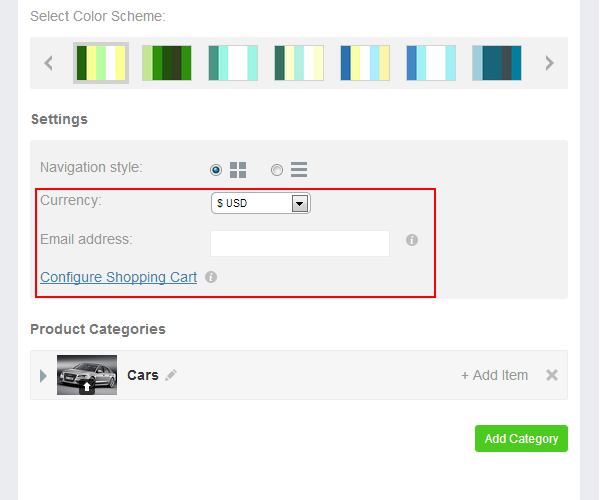
NOTE: if you enter wrong email you won’t get any orders from your users.
There are 3 tabs in the popup:
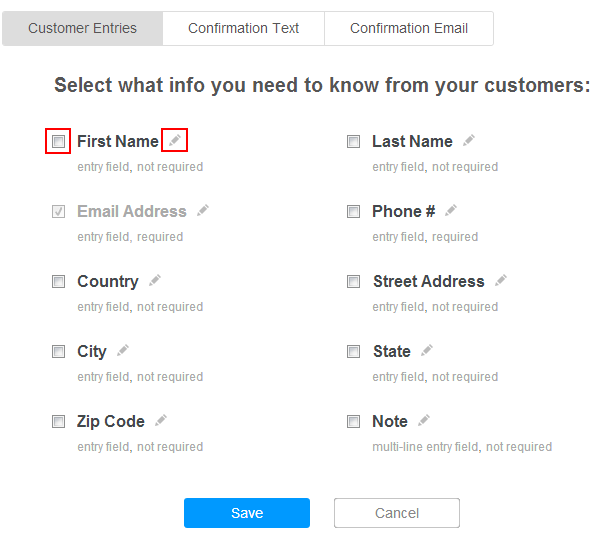
Customer Entries - before a user makes an order, they have to provide their contact info. You can choose what information you need your customer to provide (name, email, phone number, shipping adress).
To activate any of the fields check the box on the left. If you need to change or traslate a field name click "Edit" on the right.
-
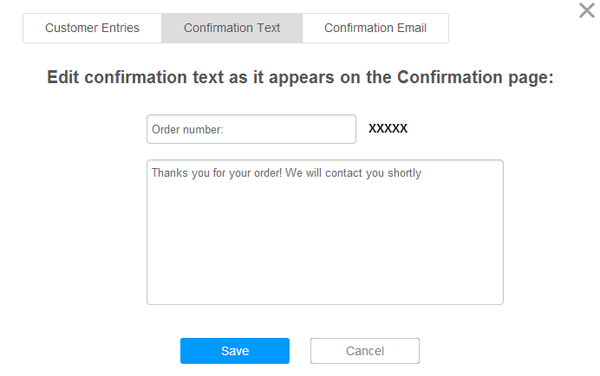
Confirmation Text - when a user submits their order they will receive a confirmation message via text message. This message will contain the order number and status of the order. Enter your own text if you need to provide your users with any extra info or you need translation, or just leave it as is.
NOTE: order numbers can’t be customized. It starts with 1 and grows with each order.
-
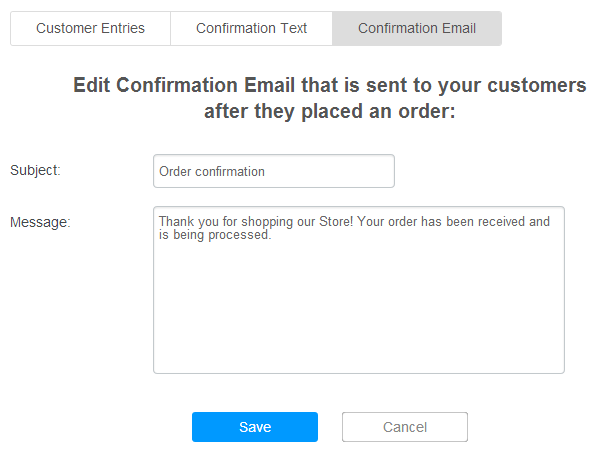
Confirmation Email - each order should be confirmed with an email. Create your own confirmation email.
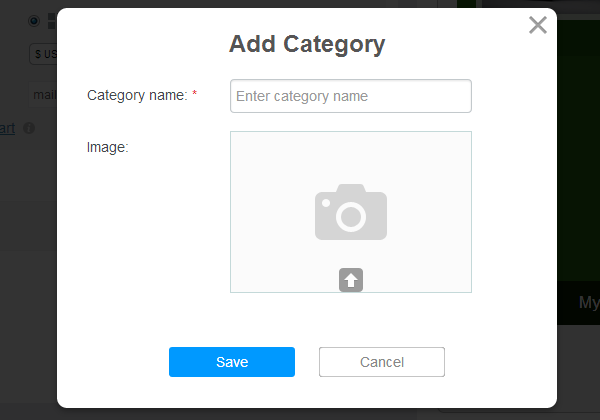
The next step is to add your items. Click "Add Category" to create new category in your list:
Enter your category name and provide the image, then click "Save" button:
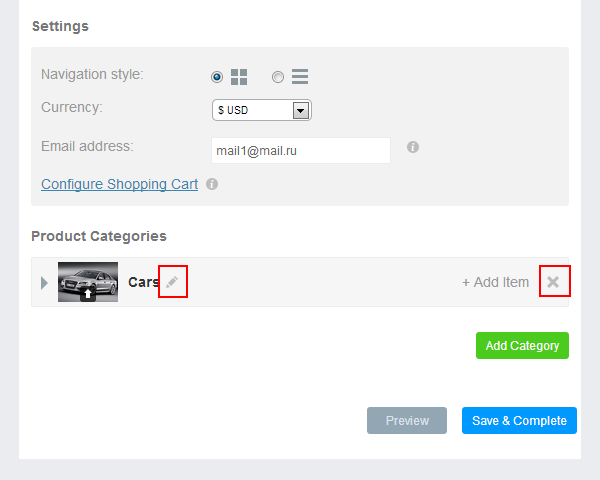
To edit any category name and image click "Edit" on the right of the category picture. To delete category click "Delete" on the right:
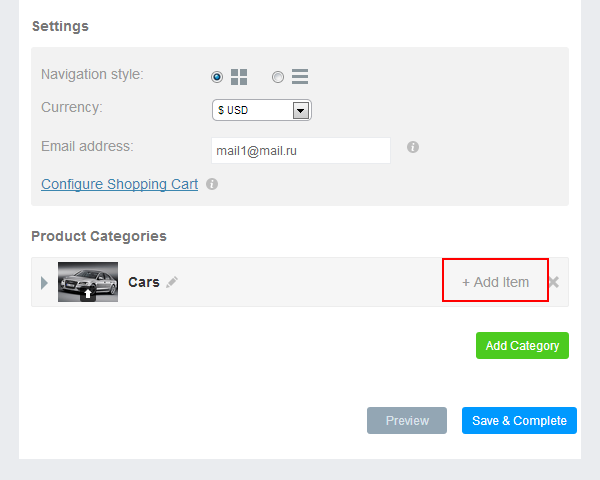
To add new items to a category, click "+Add item".
In the popup provide your item info:
- Item name
- Price
- Unit - pieces, gramms, kilos etc.
- SKU - unique item identifire that helps you to find the item in your data base
- Description
- Image
and click "Save" button.
That’s it. Now you are ready to sell your goods.
Shopping Cart: Magento
If your shop was created with the use Magento then you can synchronize it with your app on ibuildapp.com. Your app content will be renewed each time you make changes on your Magento shop.
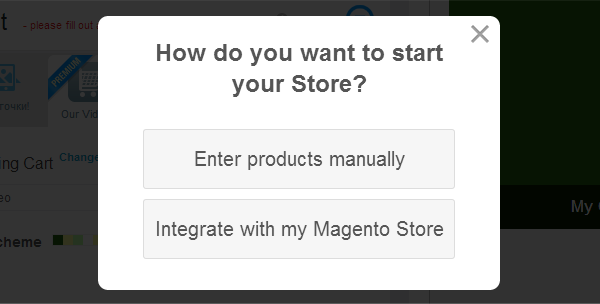
To integrate your Magento shop into the app refer to your app, choose Shopping Cart widget from the popup. You will be asked if you would like to enter products manually or you would like to integrate Magento.
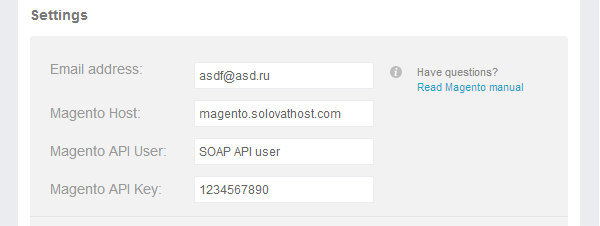
Fill in the following fields:
- Email address – you сan use any valid email to get notifications
- Magento Host - your Magento shop URL
- Magento API User – you need to have a valid parameter to integrate with Magento
- Magento API Key - you need to have a valid parameter to integrate with Magento
If you do not know how to get Magento API User and Magento API Key, follow the steps:
Step 1: Create a Web Service Role
- From the Admin menu, select System > Web Services > Roles.

- Click the Add New Role button.
- In the Role Information section, enter a Role Name such as "API".

- In the panel on the left, select Role Resources. Then do one of the following:
- To enable full access to customer, catalog, and sales information, set Resource Access to "All".
- To provide limited access to data, set Resource Access to “Custom.” Then, select the checkbox of each resource that is available to this role.
- By default, when a area is selected, full access is granted. You can accept the default, specify the actions that a person is allowed to take. Specific types of access are listed under many of the resource links, so it is easy to determine exactly what a user is allowed to do with each resource.
- When complete, click the Save Role button.
Step 2: Create a Web Service User
- From the Admin menu, select Web Services > Users.
- Click the Add New User button.
- Complete the following fields:
- User Name
- First Name
- Last Name
- Email
- In the API Key field, enter a verification key or password. This is the credential that third-party web services must use to access your Magento Go store.
- To confirm, re-enter the key in the API Key Confirmation field.
- In the panel on the left, select User Role. Then, select a Role for the user.
- When complete, click the Save User button.
For more info refer to Magento How To.
eCommerce - Apple
Before you set your eCommerce - Apple mobile app on iBuildApp.com, please set up your mobile storefront on developer.apple.com.
More…
Before you start setting up your mobile storefront please make sure you are signed up for the Apple Developer Program and filled out the necessary banking and contact info.
There are three types of products you can create in iTunesConnect:
- Consumables (the user is charged every time when purchasing the product),
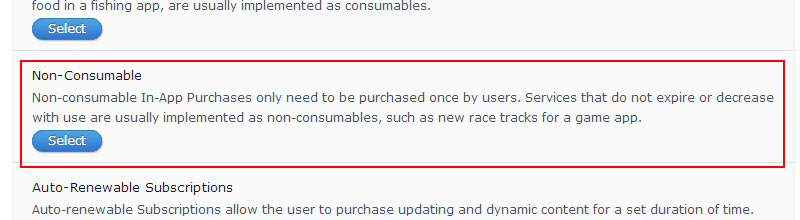
- Non-consumables (the product is purchased only once. Apple automatically takes care of "remembering" those purchases and allows the user to purchase them again for free, just like downloading apps you already purchased)
- Subscriptions (purchasing updating and dynamic content).
IMPORTANT: iBuildApp platform only deals with non-consumable products (photos, videos, pdf and other documents, etc)
First step towards embedding a store into your app is to create an App ID for the app:
- log into the iOS Developer Center, select the "App IDs" tab, and click "New App ID"
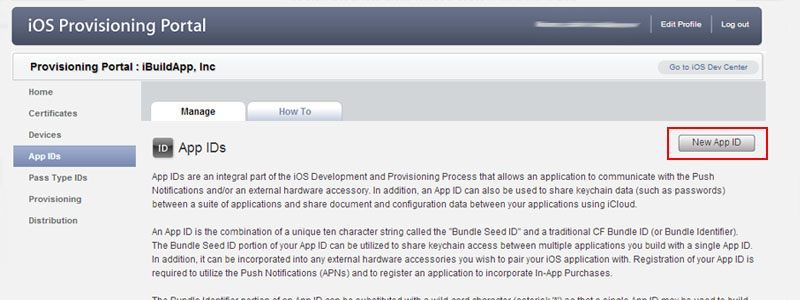
- Fill out the page by entering a description and bundle identifier:
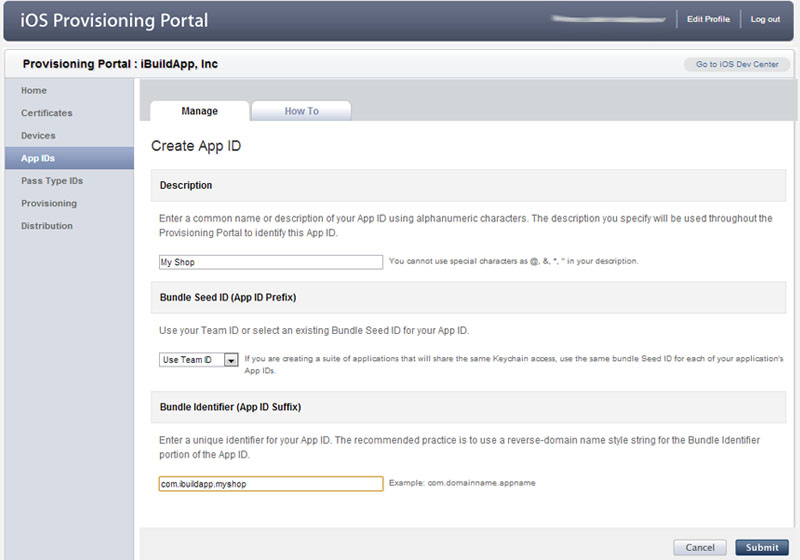
Bundle identifier should be very unique otherwise it will be declined.
Once you’re done, click Submit – you’ve just created an App ID! Now you can use it to create a new app on iTunes Connect:
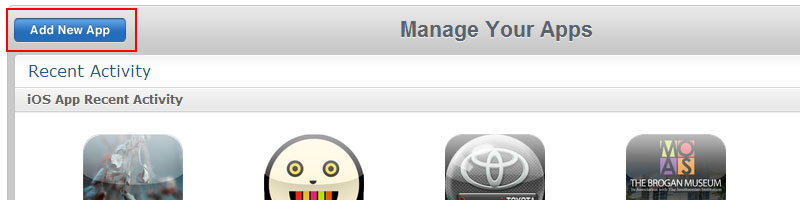
- Log onto iTunes Connect, click "Manage Your Applications", and click "Add New App" (or select an app if it’s already exists – if you’ve selected existing app, go ahead and start Managing In-App Purchases). Choose iOS App. Then enter an App Name, SKU number, and choose the Bundle ID you just made as shown below
- The next two pages will ask you for your app’s information. Just put in placeholder information for now – you can change it later:
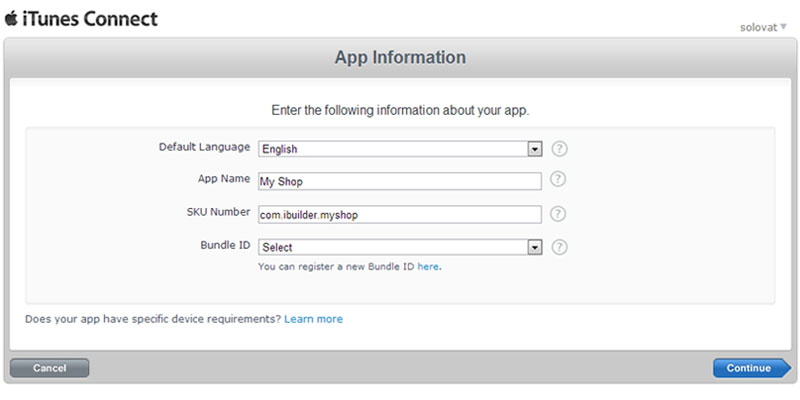
Please make sure to enter in every single item and select to ‘upload binary later’, otherwise iTunesConnect will not allow you to move further.
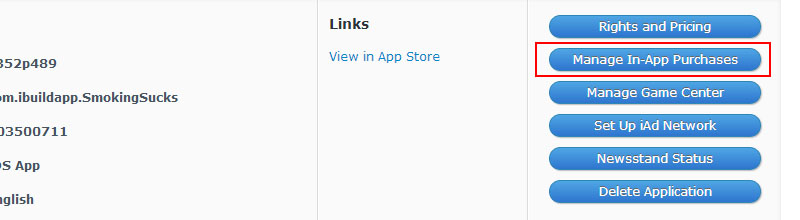
Now that you’ve decided with your app, you can go ahead and start managing your in-App purchases.
Managing In-App purchases with iTunesConnect
Before you add a product with iBuildApp, you should setup in-App purchase with iTunesConnect
- Click on the "Manage In App Purchases" button, as shown below:
- Click "Create New" in the upper left:

- Select "Non-Consumable" type of in-App purchase (no other types are supported with iBuildApp!)
- Then you’ll be taken to a page to enter some info about your in-app purchase:
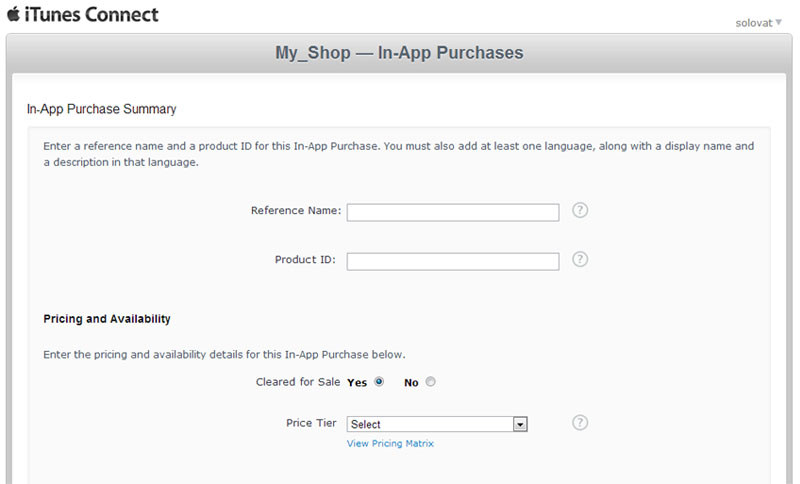
- Reference name: This is what shows up in iTunes Connect for this in-app purchase. It can be whatever you want since you won’t see it on your storefront
- Product ID: unique identifier that identifies your in-app purchase. Apple recommends using the reverse DNS notation, something like, com.mycompany.myiproduct.ifeature.
- Cleared for Sale: select "Yes" – this in-app purchase is available for users as soon as the app becomes available
- Price Tier: select how much this in-app purchase should cost
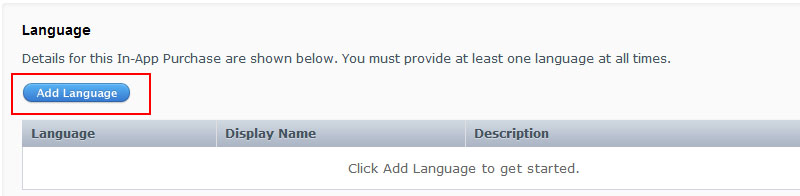
- Scroll down to the Language block and click "Add Language":
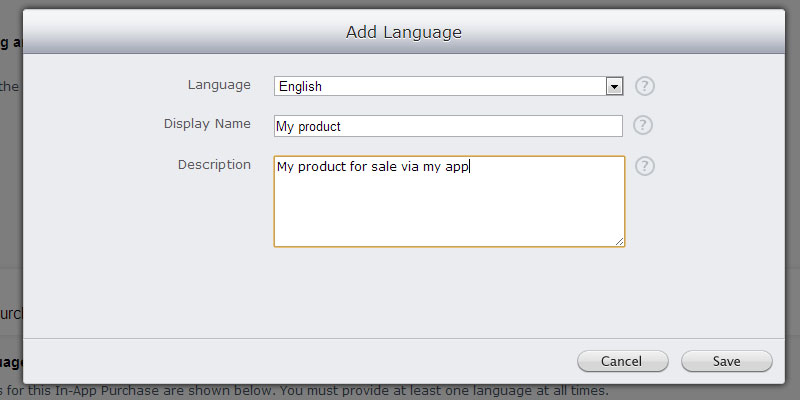
- Fill out the pop up form:
- Select "Yes" if you want to host your product with Apple:
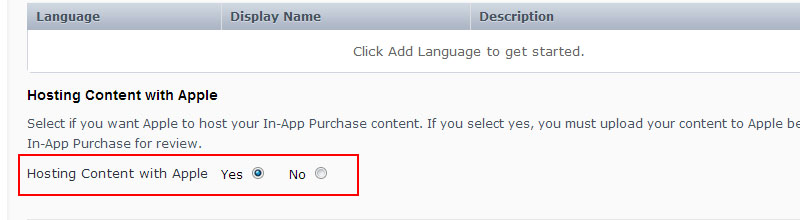
When selecting "Yes", you need to create your .pkg files via XCode. Please refer to https://docs.xamarin.com/guides/ios/platform_features/introduction_to_ios_6/changes_to_storekit, "Creating .PKG files" section, to get more info on how to create a .PKG file.
NOTE: Apple will deliver your product only for iOS 6 and later. In order to support earlier iOS versions, you should upload the product on another server and provide that URL on iBuildApp.
When selecting "No", you’re responsible for hosting your content (i.e. it can be YouTube server for video, your own server, or iTunes).
- Add description (optional) and screenshots (required). Then click ‘Done’ – and you’re finished with this in-app purchase!
Add as many products as you need.
Read more here:
https://itunesconnect.apple.com/WebObjects/iTunesConnect.woa/wo/16.0.0.9.1.7.1.5.3.1 .
NOTE: in-app purchases cannot be used to deliver product updates. Every time you update in-app purchases you should submit updated binary file.
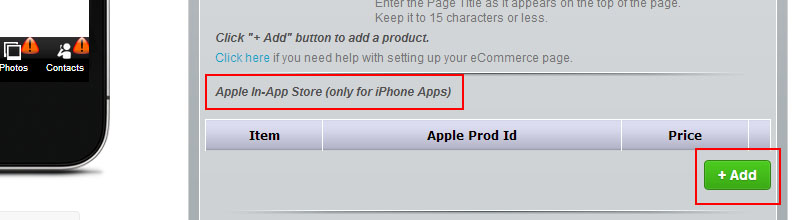
Select eCommerce widget as a page type and click "Add" button in the "Apple In-App Store" section to add a new in-app purchase:
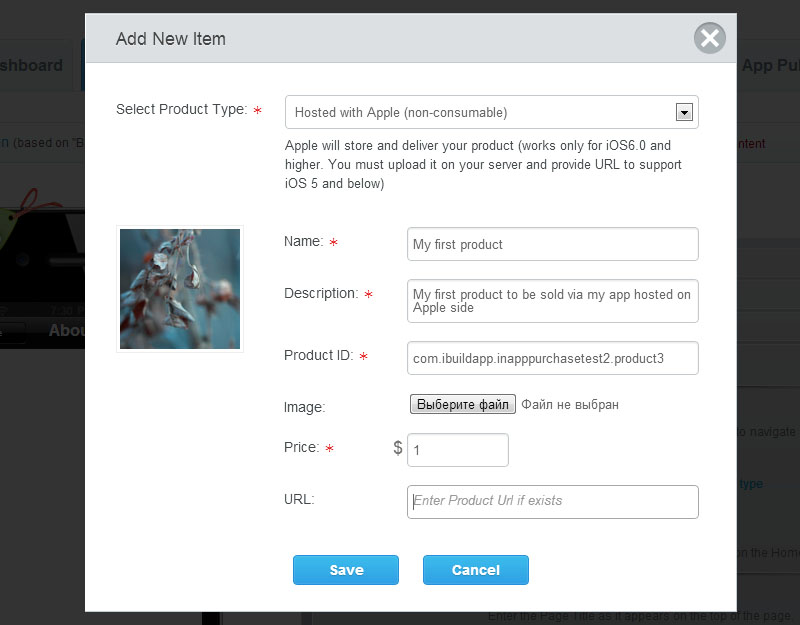
iBuildApp supports 3 product types:
- Hosted with Apple (non-consumable) – Your product (music, video, large files, etc) is hosted with Apple. Apple will store and deliver your product for iOS6.0 and higher (if you want your app to support iOS 5 and below, upload the content on a remote server and provide that URL).IMPORTANT: You should setup an in-app purchase with iTunesConnect before adding it on iBuildApp.
- Hosted on remote server (non-consumable) – Your product is stored on a remote server (it can be any downloadable content, including youtube video, pdf files, web page, etc). You provide the download URL and the content will be delivered within your app.IMPORTANT: You should setup an in-app purchase with iTunesConnect before adding it on iBuildApp.
- iTunes store product – Display products from iTunes store (apps, music, video, books) within your app.NO setup is required on iTunesConnect.Read more on how to sell on iTunes:
For the first two product types (Hosted with Apple and Hosted on Remote Server) you will be asked to enter the Product ID. It should be the same Product ID you’ve entered for your in-App purchase in iTunesConnect. Copy the Product ID from iTunesConnect and paste it as shown in the image below:
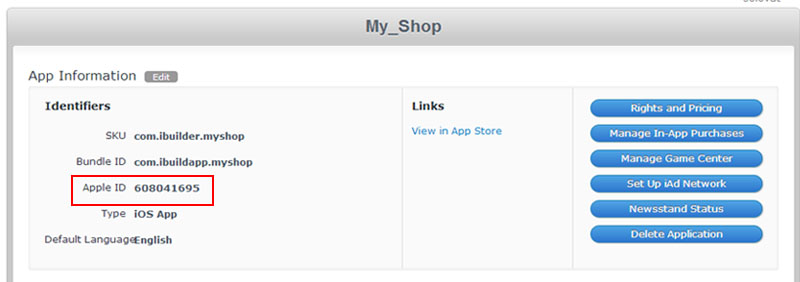
For the iTunes Store product type you need to enter product’s Apple ID. Apple ID for a product can be inferred from its iTunes Preview URL link. In any iTunes product link (for apps, music or books) find the part of the URL beginning with id and use the number that ful class="ul_ins"lows.
For example, the direct link to a product is: https://itunes.apple.com/us/album/drunk-with-city/id290713563?i=290713676#
For the app you published, you can find the Apple ID from iTunesConnect:
Web
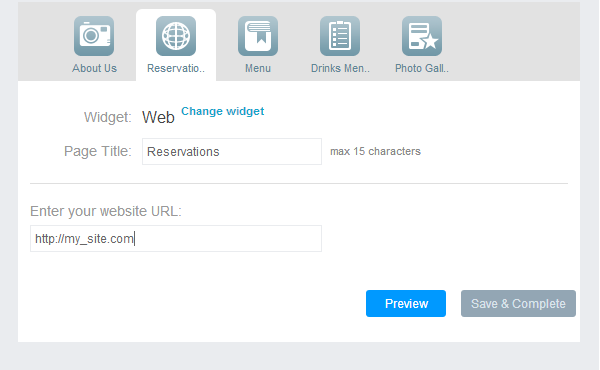
Have you got a website that you would like to have in your app? Use our Web widget for that purpose.
To insert Web widget into your app choose it in the change widget type popup and simply enter a "Page Title" and provide your site URL.
BarCode scaner
Launch the barcode scanner module in your app.
The module immediately opens up the phone’s camera and takes you to a screen that allows for the scanning of barcodes:

The scanner will automatically detect which type of code it is scanning and, upon completion of the scan, it will display the content so you can view the scanned URL/text/product code before the module launches the phone’s browser:

You may view the scanned content in a web browser: it will search for scanned text on the web or open a website for scanned URL:

The module offers sharing feature that allows users to share scanned content via SMS or email:
Twitter
Would you like your followers to read your tweets via the app? No problem.
Embed our Twitter widget into your app. Copy your Twitter username and paste it on iBuildapp.com:
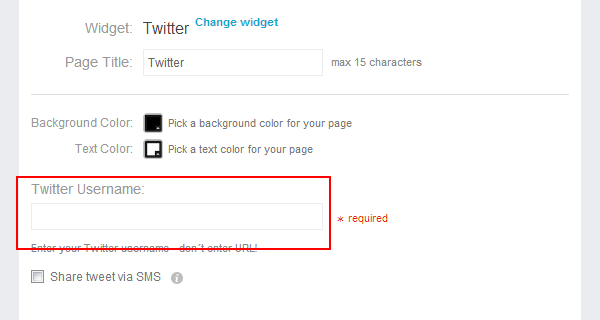
You can also allow your users to share your tweets via sms by enabling the Share option at the bottom of the page.
Calculator
The widget allows you to create a custom calculator with pre-defined variables, constants and calculation logic (formula).
It will calculate using given formula and user-entered parameters.
Examples: tips calculator, morgage calculator.
Q: Which mathematical operations can I use?
- + - Add
- - - Subtract
- () - Math Brackets
- * - Multiply
- / - Divide
- ^ - Power of
- abs - Absolute value
- exp - To get e raised to a power
- log, log10 - logarithm of a number
- sign - numbers sign (returns -1, if the number is negative; 1, if the number is positive)
- sqrt - square root of a number
- sin - sine of an angle
- cos - cosine of an angle
- tan - tangent of an angle
- atan - arctangent of a number
Q: Can I use expressions?
Here are examples of expressions you may use in your formula:
- a * b + b/2
- a * (0.01 + b)/c
- exp(a)
- log10(a)
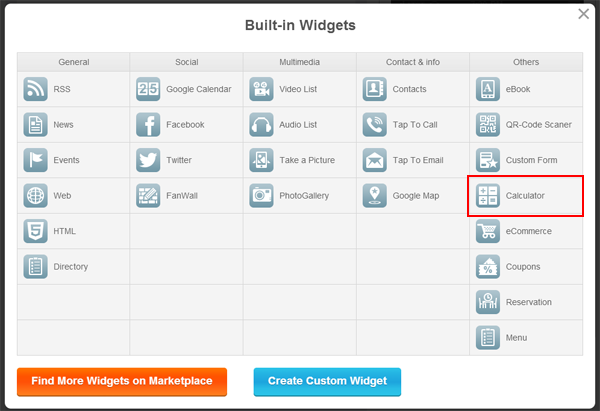
Q: How can I embed this module into my app?
Choose "Calculator" widget from "Change page type" popup:
Type the calculator name and description:
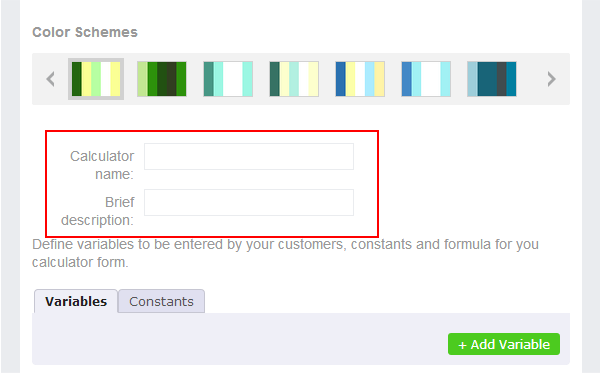
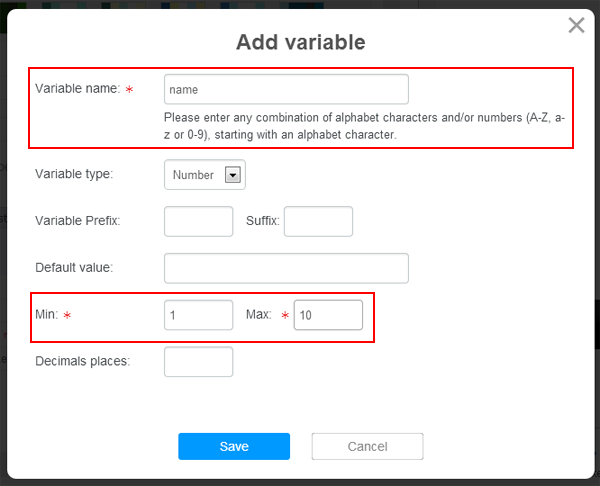
On the "Variables" tab create variables for your formula - use "Add Variable" button:

On the "
Add variable" popup, enter Variable name, Min and Max values and other parameters (if needed) and then press "
Save" button.
Note: only latin symbols are allowed in variable names
To edit or delete variables use appropriate icons on the right in the variable list.
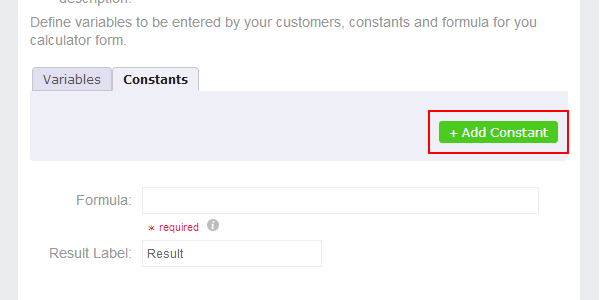
On the "Constants" tab create constants for your formula (if needed):
On the "Add constant" popup, enter constant name and value, and click Save.
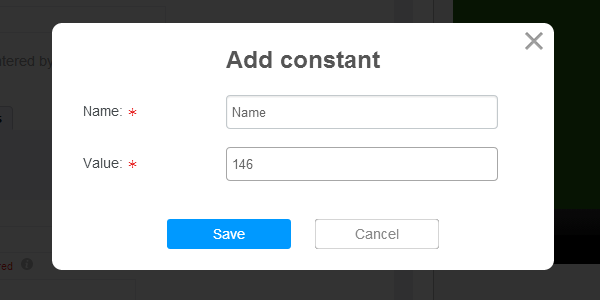
NOTE: only latin symbols are allowed in variable names.
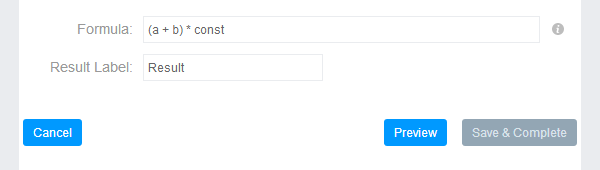
When you’re done with variables and constants, specify the calculation formula: use spaces to separate variables, constants and operators.
You can also customize the Result button:
Audio
What audio formats are supported?
We support two digital music formats:
There are three ways to embed your audio into your app:
- Using files
- Using streaming servers
- SoundCloud;
- Shoutcast (streaming in MP3 and ACC);
- Icecast (streaming in MP3 and ACC);
- Using playlists:
- PLS (file_name.pls)
- M3U (file_name.m3u)
- M3U (file_name.m3u8)
- XSPF (file_name.xspf)
Audio widget: customization
With Audio widget, you may setup cover image for your audio list. You can also allow your customers sharing tracks via Facebook & Twitter, and post comments.
NOTE: to activate the life-time messaging, you should set up push notification services in your app.
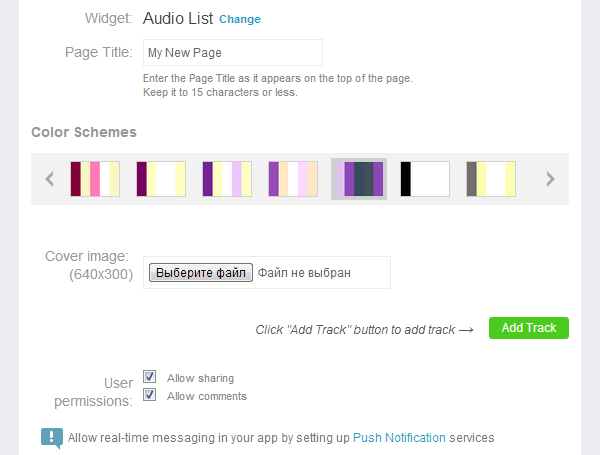
You can add, edit or delete audio tracks from your app using "Add", "Edit" or "Delete" icons.

In the popup window provide the track caption, link and description:
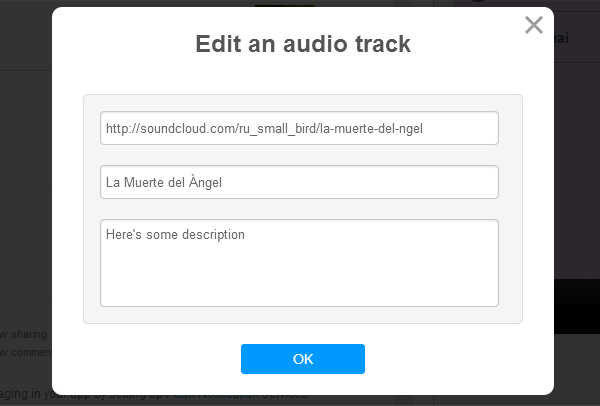
When uploading playlists from SoundCloud, all descriptions come together with tracks. You can edit them within iBuildApp system - with no changes on SoundCloud.
Audio Files
- Make sure that you files are in MP3 format (your files should have the ".mp3" extension. If you're not sure how to check a file extension, please refer to your OS documentation).
- If your file isn"t an MP3 then you need to convert it to .mp3.
There are plenty of special software and online services for converting audio files from one format to another.
- https://www.koyotesoft.com/audio-software/free-mp3-wma-converter.html is an example of the software.
- https://www.video2mp3.net/ is an example of the online service.
- Upload your file either on your own online server, or use any file hosting service.
IMPORTANT: make sure your files are publically available (login and password are NOT required to access files);
- When using a hosting service, make sure they provide direct access to your files.
- These are examples of file hosting services:
- https://www.upload-mp3.com/
- https://www.webfilehost.com/
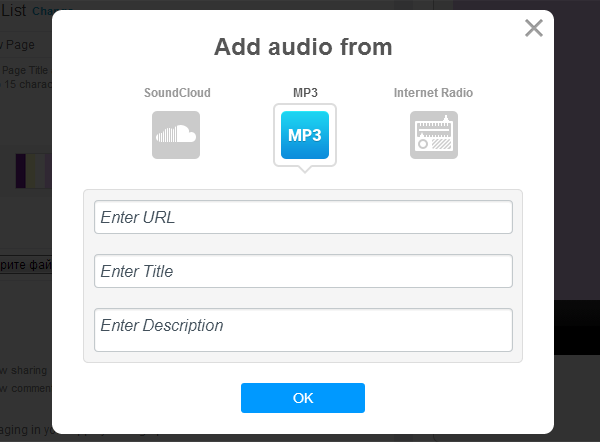
- To embed audio file into your app you should provide direct link to that file on your hosting server. "Direct link" means the link should point on that file directly. Your link should look as the following: https://www. your_site_name/you_folder/file_name.mp3
To embed .mp3 file into your app, click "Add Track" button and choose "MP3" option. Enter the link, a caption and description. Than click “Save” button:
Streaming Server
Streaming server is software for streaming media (audio) over the Internet. An example of the streaming server usage can be online radio:
https://www.rmf.fm/https://audiorealm.com
The most popular streaming servers are as the following:
- Shoutcast (streaming in MP3 and ACC)
- Icecast (streaming in MP3 and ACC)
- SoundCloud
iBuildApp supports all of them if they broadcast your music in MP3 or ACC format.
You can use broadcast services to host your audio files. Such services provide you with direct link to your audio file. Here are examples of such services:
- https://mp3songurls.com/
- https://www.wowza.com
If you are an advanced user you may create your own streaming server. For more info on streaming servers please refer to:
- https://www.shoutcast.com/
- https://www.icecast.org/
To embed the broadcasted audio to your app, you should provide the address of the streaming server and it should fit the following pattern:
- https://84.16.227.59:8010/
- https://80.86.106.35:9000/
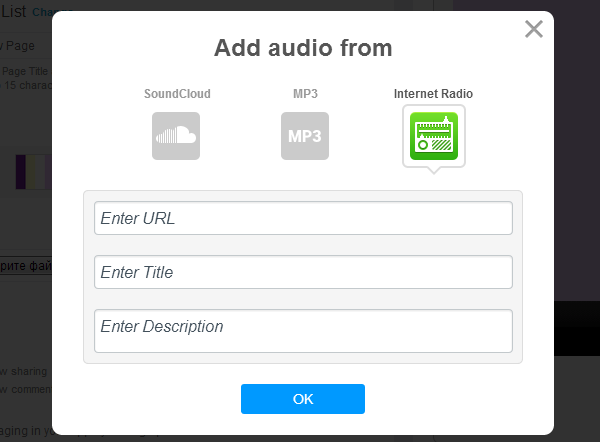
To embed stream file into your app, click "Add Track" button and choose "Internet Radio" option. Enter the link, a caption and description. Than click "Save" button:
Play List
Playlist is a file that contains list of the audio files.
We support the following playlists:
- PLS (file_name.pls)
- M3U (file_name.m3u)
- XSPF (file_name.xspf)
- M3U8 (file_name.m3u8)
If you are an advanced user you can create a playlist yourself. An example of the software that you can use for creating playlists is Winamp. You can also create the list manually.
You can also use playlists provided by third party software. For example, you can obtain the playlist on the online radio site.
NOTE: All playlists should contain info about audio accessible through the Internet. Otherwise it will not work.
Your playlists should be available on the Internet. You can host the playlist files on your site or use any hosting service.
To use the playlist, provide a direct link to your audio file.
You link should fit the following pattern:
- https://www. your_site_name/your_folder/playlist_name.pls
- https://www. your_site_name/your_folder/playlist_name.m3u
- https://www. your_site_name/your_folder/ playlist_name.xspf
To embed a playlist into your app, click "Add Track" button and choose “Internet Radio” option. Enter the link, a caption and description. Than click "Save" button:

SoundCloud Audio stream
If you want using audio tracks from your SoundCloud storage, select "Audio" widget as a page type.
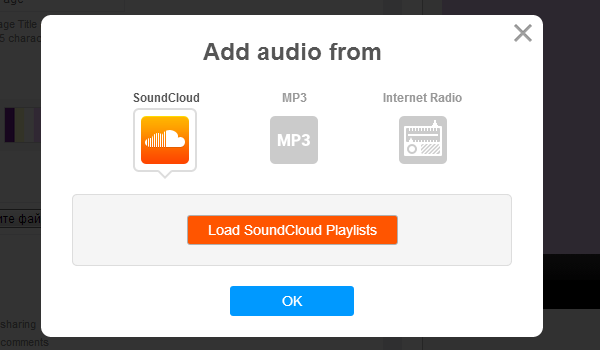
- Click the "Add track" button and in the popup window then choose “SoundCloud” type and then click “Load Soundcloud Playlist”
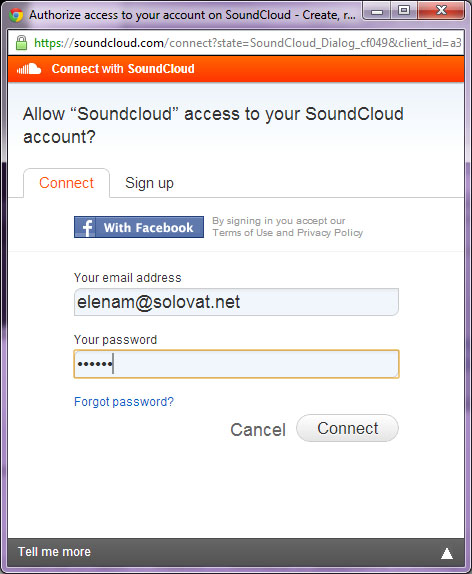
Note: you need to have an account on SoundCloud.com
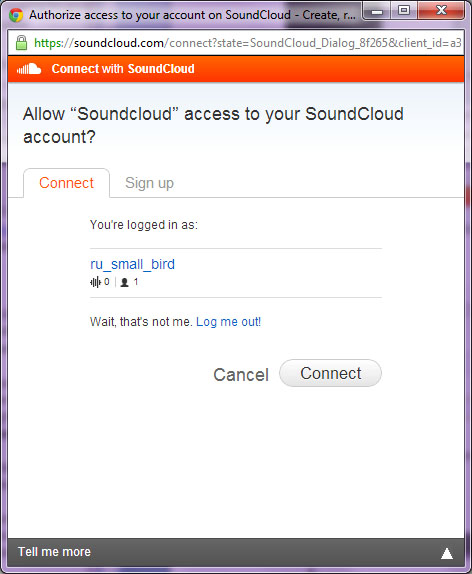
- Depending on wherther or not you’re logged in, the SoundCloud login or Synchronization page will pop up. Fill out required info and click "Connect":
- Once synchronized, all audio sets and tracks from SoundCloud account became available on ibuildapp.com
Note: If you make any changes on SoundCloud.com you have to synchronize it with iBuildapp again.
- You can make certain tracks and sets hidden using appropriate controls. Hidden tracks will not be shown in your app.
Note: administering your track list from ibuildapp.com will not affect your SoundCloud’s list.
- Make sure that your tracks are available for synchronization with iBuildApp by checking the following options on SoundCloud.com:
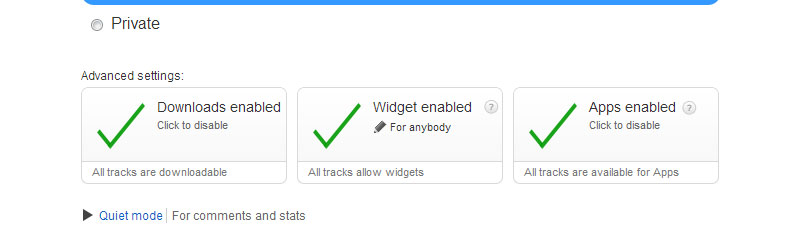
Otherwise you may see a track disabled, as shown below:

Video
Which video formats are supported?
We support the following video formats:
- mpeg4 .H264 (iPhone and iPad);
- mpeg4.H263 (Android devices);
- 3gp;
You may also use your videos hosted on YouTube and Vimeo servers.
Video widget
With video widget, you may add, edit or remove video tracks from the list, also rearrange tracks; you can allow sharing tracks via Facebook, Twitter and lifetime comments.
NOTE: to allow life-time messaging you should set up push notifications in your app.

Click "Add Track" button to add a video.
Video hosted on external server
If you have your video hosted on external server (Vimeo, YouTube, or any other hosting server), add a link for that video file.
- Make sure that you files are in mpeg4.H264 (iphone), mpeg4.H263 (android) or 3gp format. Your files should have the ".mp4" or ".3gp" extension. If you do not know how to check your files extension, then you should refer to your OS documentation.
- If your file isn’t an mpeg4.H264 (iphone), mpeg4.H263 (android) or 3gp then you need to convert it to mpeg4.H264 (iphone), mpeg4.H263 (android) or 3gp . There are plenty of special software and online services for converting video files from one format to another.
https://www.any-video-converter.com/products/for_video_free/ is an example of the software.
https://www.online-convert.com/ is an example of the online service.
- No matters where you store your video files - on your site or using a hosting service - but it should be available directly and have public access.
Example: https://www. your_site_name/you_folder/file_name.mp3
-
When choosing a hosting service, make sure it provides direct access to your files. These are the examples of file hosting services:
- https://www.upload-mp3.com/
- https://www.webfilehost.com/
Video hosted with iBuildApp.com
If you want upload your video file on iBuildApp’s server, choose "Upload" option In the "Add video" popup window; locate your video file, enter video title and description. Then click "Save" button.
Supported formats: avi, 3gp, m4v, mov, wmv, mpeg, mp4; maximum file size - 20Mb.
Youtube Video
Go to Youtube.com site and open the video you would like to embed into your app. Hover the mouse over the video and right click on video frame to see a context menu. Select "Copy video URL":
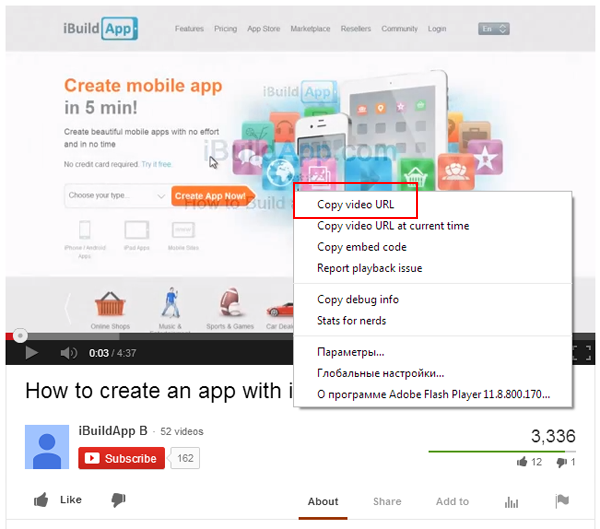
Go back to iBuildApp.com, choose YouTube option In the "Add video" popup window; paste the link and click "Save" button.
Video details, including title and likes, will be shown within your app.
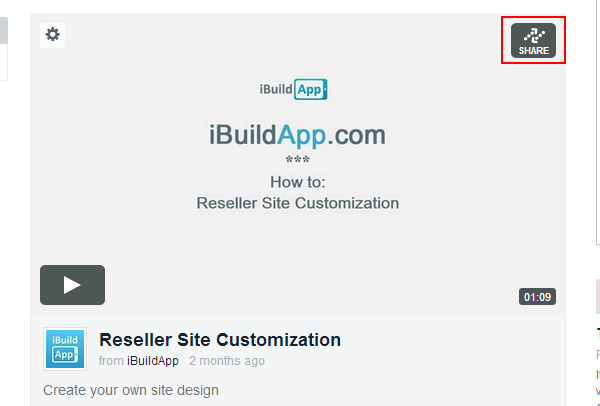
Vimeo video
Go to Vimeo.com site and choose the video you would like to embed into your app. Click "Share" button (that appears when you hover your mouse over the video player) and copy the video url.
A screen will pop up and you can copy your video link.
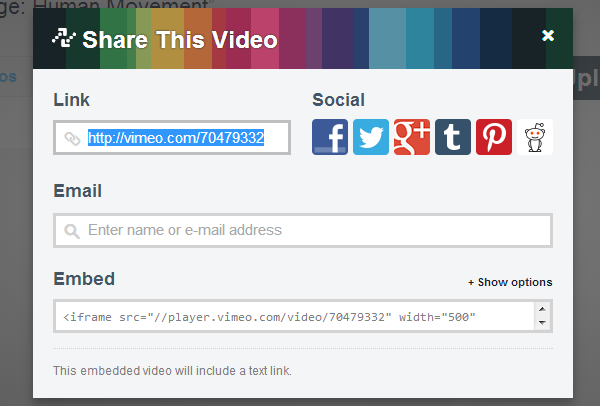
Then go back to iBuildApp.com, choose Vimeo option In the "Add video" popup window; paste the link and click "Save" button.
Table Reservation
The widget allows you to provide your users with an opportunity to reserve tables in your Bar or Restaurant.
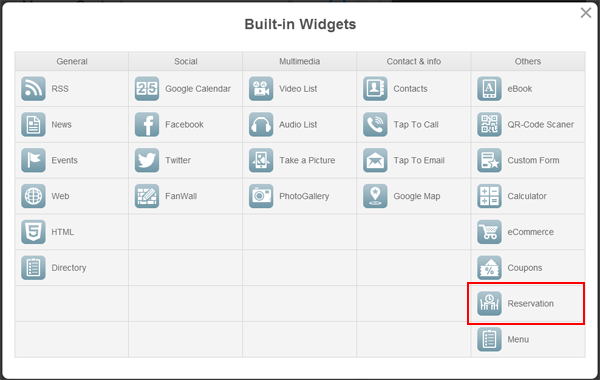
How can I embed this module into my app?
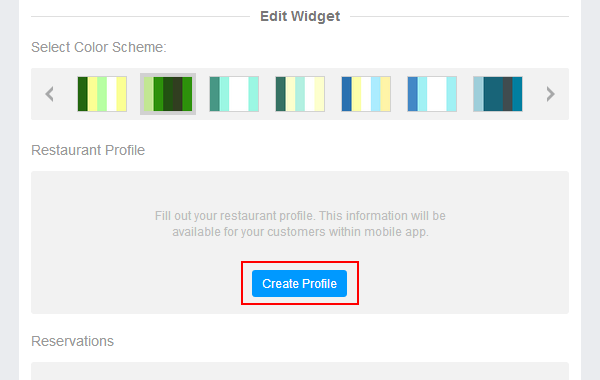
Choose "Table Reservation" widget from "Change page type" popup:
Locate the "Create Profile" button and click it to create your Restaurant profile:
Fill in the fields in the popup window and click "Save" button to save changes or "Cancel" to cancel. Note that:
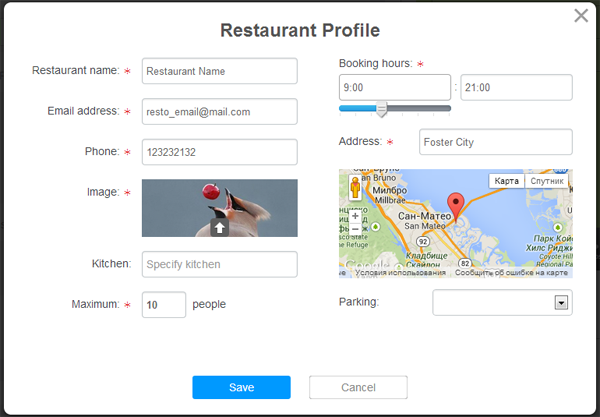
When you are ready with your Profile you can choose your colour scheme.
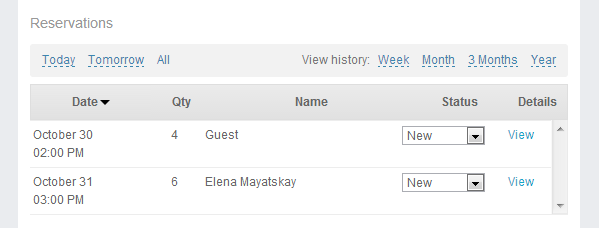
How can I manage my reservations?
All the reservations made are listed on your Dashboard. Each reservation comes with:
- Reservation Date
- Guests quantity
- Guest name
- Reservation Status
- Details
Use filters above the table to search reservations. By default the filter is setted to "Today". Click "Tomorrow" or "All" control to view upcoming reservations. Click "Week", "Month", "3 Months" or "Year" to view reservations history.
To change reservation status use the "Status" drop down list on right.
Directory
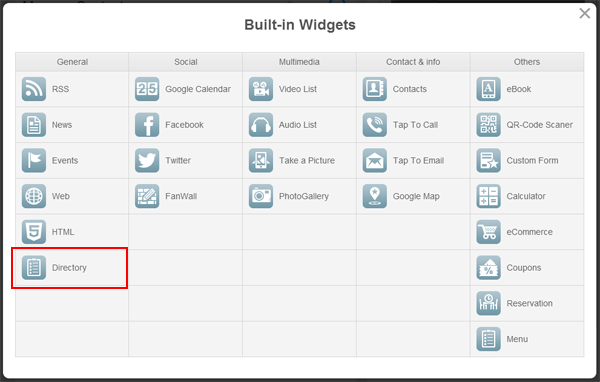
Directory widget allows to organize items in categories.
Choose "Directory" widget from "Change page type" popup:
Customize the layout: grid or list view:
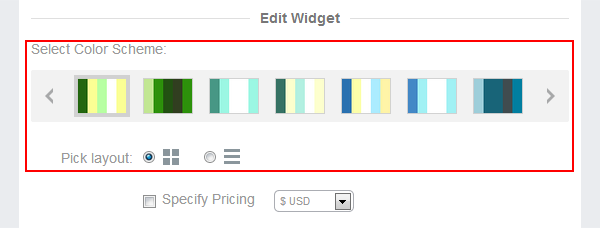
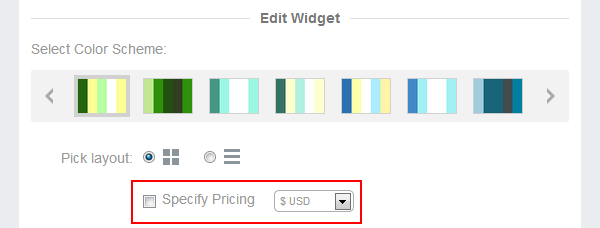
If you want to use pricing with your catalog, check the Pricing control and choose currency:
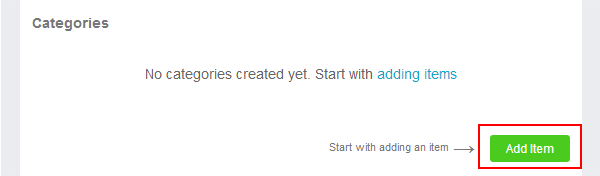
To start your listing, click "Add Item" button:
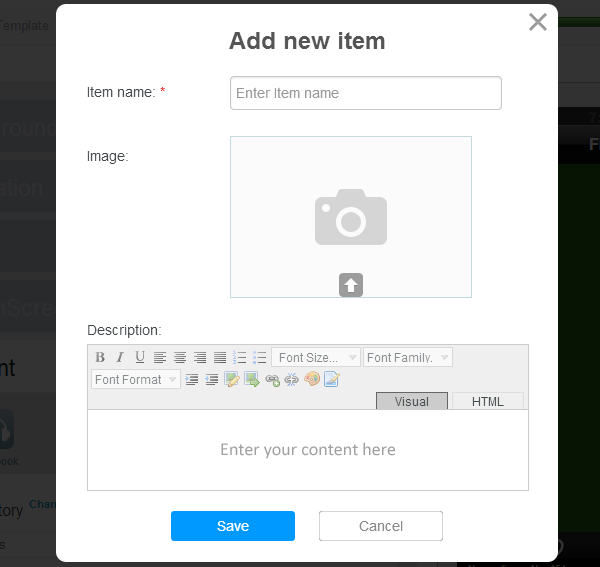
Enter the title, upload image, type description and click "Save" button:
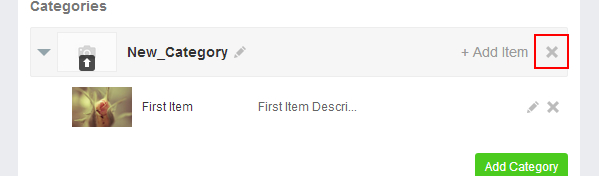
First item will be automatically added to New_Category category. Go ahead and change that category’s name and upload an image, unless you want one-level listing (with no categories).
To add an item into a category, click "Add Item" to the right on the category name:
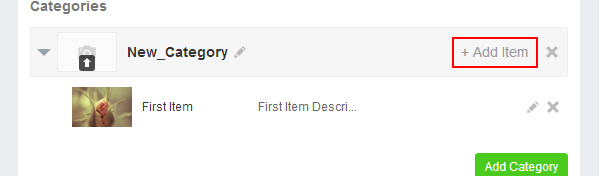
Add as many items as needed.
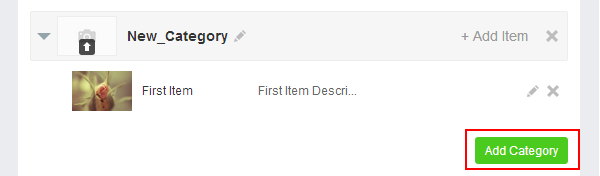
Click "Add Category" button to add a new category:
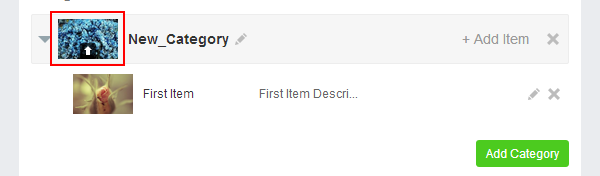
To change category name, click on pencil icon next to the name.
To change Category icon, click on the image placeholder with arrow icon. It will come up with file browser window - locate an image file you’d like to use for your app icon and click "Open".
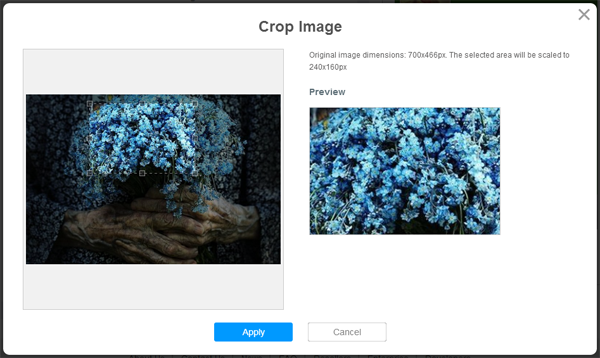
Crop the image in the popup window and click "Save" button to save or "Cancel" to cancel image change:
To add an item with in the category click "Add Item":
To delete the category click the "Delete" control:
FanWall
If you would like to connect your users or get feedbacks then you can use FanWall in your app. Push commercial and offers to your clients and get the feedback. Let your friends share their impressions and emotions via your app.
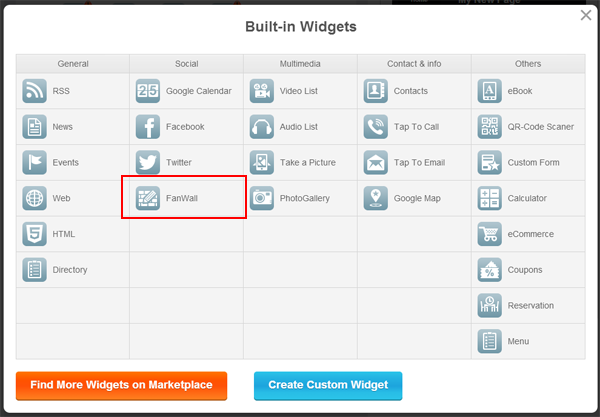
How can I embed the FanWall module to my app?
Create the "FanWall" type page in your app
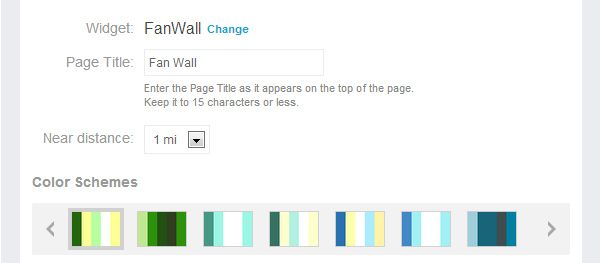
Set up your widget:
Set the "near distance" option. That will help your users to find their companions that are nearby.
You can set the value to
NOTE: this option is setted to "1 mile" by default.
Choose desired colour shcema for your widget. Simply click desired colour schema, it will be applied automayically:
You can set if you want your users leave comments within your app or not. Simply check the chackbox if you would like to get feedback from your users:
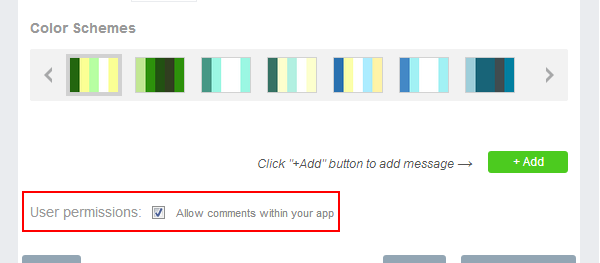
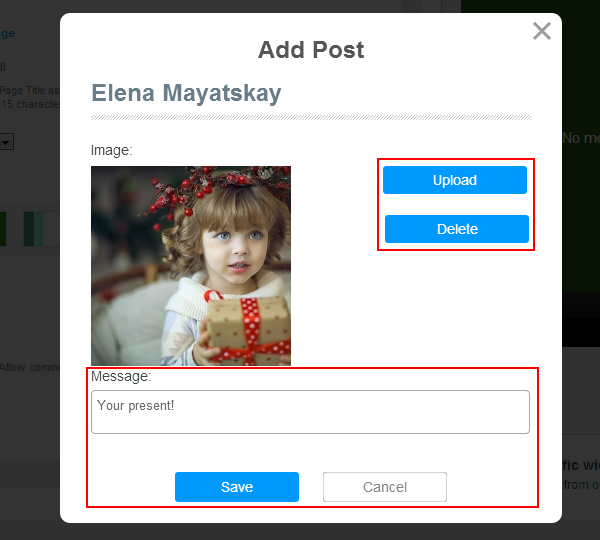
With the help of the "+Add" button you can add a message to your Wall via Dashboard. Press the button and fill in the fields in the popup. You can create a message with an image or text only. You can delete the image upload with the help of the “Delete image” button.
After you press the "Save" button your message will be added to the message list and your users will get the opportunity to read it using their devices.
NOTE: the post will be created under your ibuildapp.com account. If you would like to create a post, using Facebook or Twitter account, you’ve got to use your device.
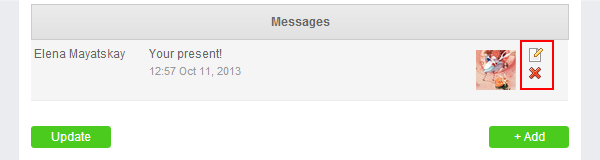
You can edit all the messages posted on your Wall via iBuildApp.com. Use the icons on the right of the posts to edit or delete messages.
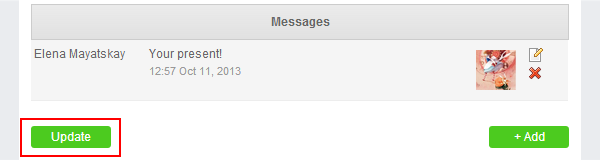
To update the list of the messages use the "Update" button.
Can I moderate my Wall?
Yes, you can.
Login ibuildapp.com under your account and open the Wall in the App Constructor. You will find the list of all the posts on your Wall. Find the post you would like to moderate. Note, that you can edit a post even if you are not its author. To edit or remove use the icons on the right.
Map
Getting your store known through an app is only the first step for many businesses. Last time we talked about creating custom templates, which allow you to make the basic structure of your apps efficiently, today we will create a map to your location. Getting people to your offices or store front obviously has its advantages. What more people coming into your store means is more customers on your premises.
If you followed along with the template tutorial, you already know the way to begin creating an app. This time, we will create an application. Create a new application, pick whether you want a phone or a tablet application, give it a name and then follow the first three steps on your own. The final step – the one for content, is where we want to begin.
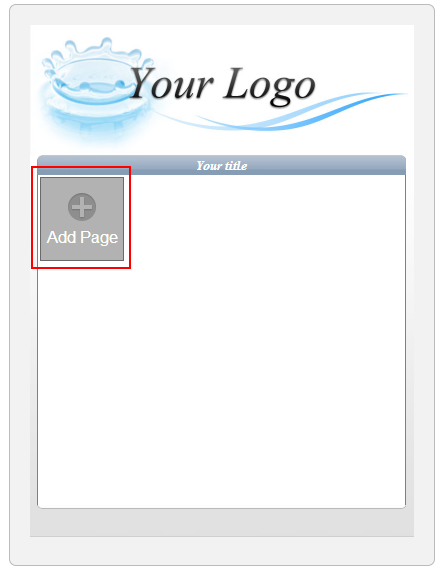
Click on "Add Page" on the left side of the screen to get started. You can add a dozen of different types of pages.
You will be taken to the editing page immediately. Select "Change Page Type".
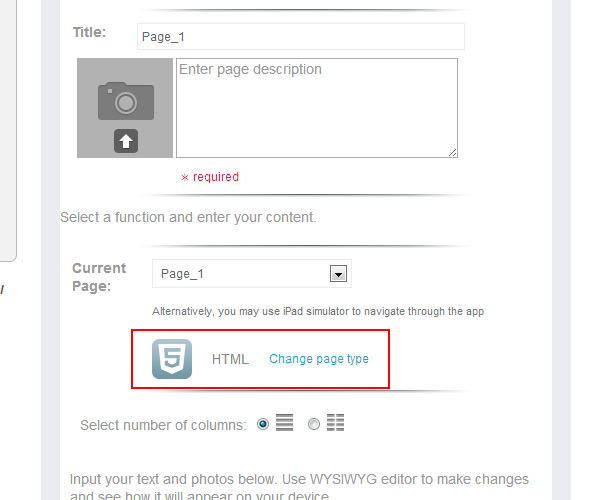
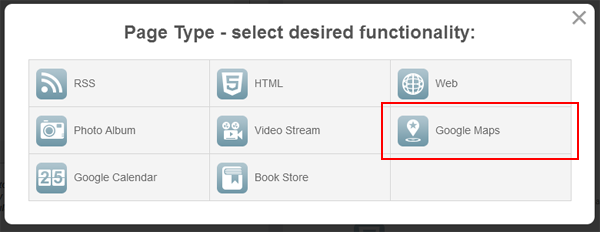
It may be hard to find with the number of options available, but the maps widget is the last option on the right.
From here, you can add a number of pins to your map, label them in an informative way and point your customers to the right direction.
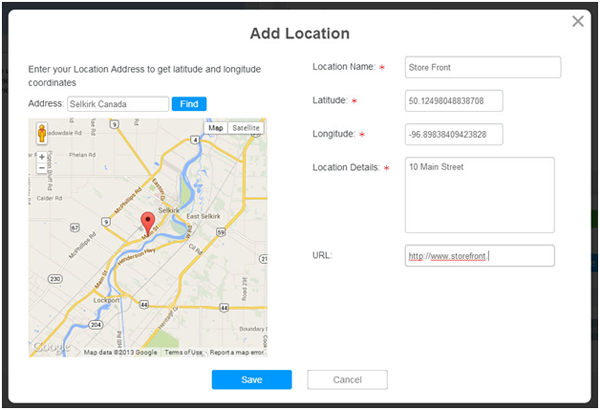
With this level of details in their hands, your customer will be able to find you without an issue. They will know where to find you. The rest of your application should prepare them for what they will find in your store.